1 The Modern Observability Stack: Architecture and Strategy
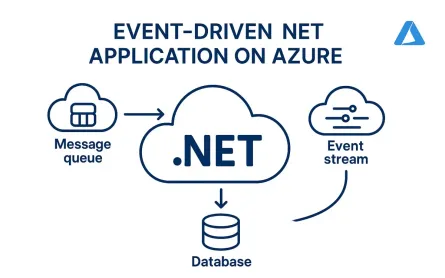
Modern .NET applications on Azure are rarely simple, single-process systems. They usually consist of multiple services, background workers, message queues, and third-party dependencies. When something goes wrong, the problem almost never lives in just one place. A slow request might start in the browser, pass through an API, wait on a queue, hit a database, and fail in a background worker minutes later. Without observability, teams are left guessing which part of that chain broke.
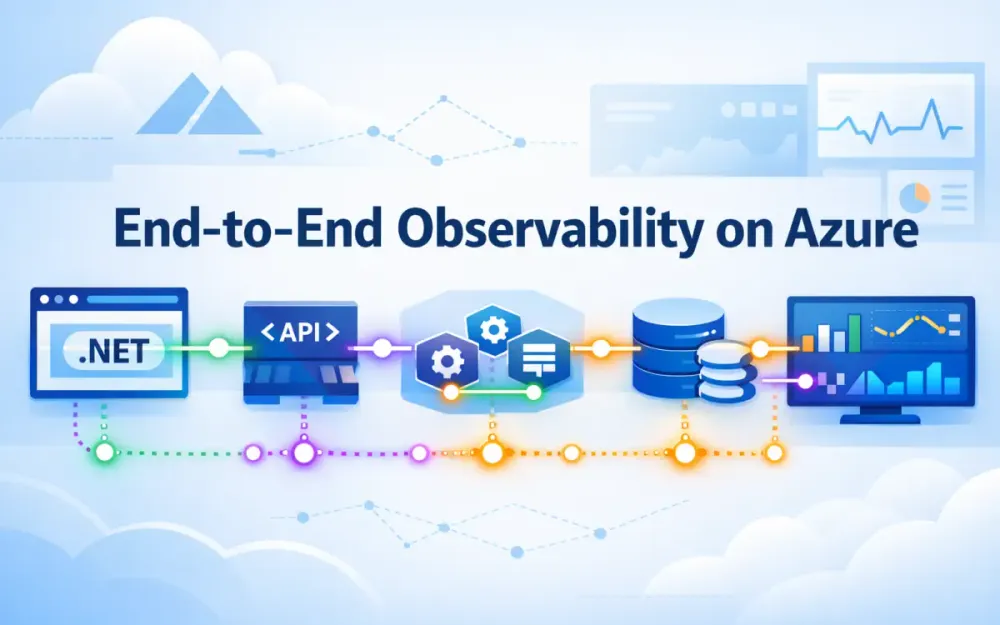
Observability gives you the ability to follow a request as it moves through the system and understand what happened, where it slowed down, and why it failed. The shift from the legacy Application Insights SDK to OpenTelemetry (OTel) fundamentally changes how teams approach this problem. Instead of instrumenting code for a single vendor, teams now instrument once using open standards and decide later where that telemetry should go. Azure Monitor becomes one destination—not the instrumentation itself.
This section explains why that shift matters, how Azure Monitor fits into the OpenTelemetry model, and which architectural patterns make end-to-end observability practical in real systems.
1.1 The Paradigm Shift: Moving from the legacy Application Insights SDK to OpenTelemetry
The original Application Insights SDK made observability easy to adopt. You added a package, enabled it, and immediately got request tracking, dependency calls, exceptions, and performance counters. For early cloud workloads, that was often enough. But the SDK was tightly coupled to Azure Monitor’s internal data model and assumptions about how applications were built.
As systems became more distributed, that tight coupling started to hurt. Teams ran multiple languages, mixed hosting models, and non-HTTP workloads. They needed consistent telemetry formats, more control over what data was collected, and the ability to process or filter telemetry before it was sent anywhere. The legacy SDK was not designed for that level of flexibility.
OpenTelemetry addresses these problems with three core ideas: a standard API for instrumentation, a shared data model across languages, and a configurable pipeline for processing telemetry. With Microsoft’s decision to make OpenTelemetry the foundation of Azure Monitor, the old Application Insights SDK is no longer the future path. New investments—better trace correlation, first-class log integration, and multi-destination pipelines—are built on OTel.
1.1.1 Why Microsoft is betting on OTel for Azure Monitor
Microsoft’s move to OpenTelemetry is mostly about reality, not ideology. Real-world systems are polyglot. A single solution might include .NET APIs, Java-based data services, Node.js frontends, Python workers, and managed Azure services. Maintaining separate, vendor-specific telemetry SDKs for each runtime does not scale.
OTel provides a common language for telemetry across all of these environments. Traces, metrics, and logs look the same whether they come from .NET, Java, or JavaScript. Azure Monitor can ingest this telemetry directly, without forcing teams to adopt Microsoft-specific instrumentation libraries everywhere.
There is also a platform benefit. Azure services like Application Insights, Container Insights, and Managed Prometheus work better when telemetry follows consistent conventions. OTel standardizes key attributes such as service.name, deployment.environment, and cloud.region. That consistency makes correlation and visualization much more reliable.
Finally, the OpenTelemetry Collector gives Microsoft—and customers—a powerful control point. Instead of every application talking directly to Azure Monitor, telemetry can flow through a Collector that batches data, retries on failure, removes sensitive attributes, and applies sampling. This makes large-scale observability operationally manageable.
1.1.2 Vendor neutrality vs. vendor-specific features
Vendor neutrality means you instrument your code once and keep your options open. A team might start by sending telemetry to Azure Monitor, then later route traces to another backend for deep analysis or long-term retention. With OpenTelemetry, that switch does not require rewriting application code.
At the same time, vendor-specific features still matter. Azure Monitor provides capabilities that go beyond raw telemetry storage: the Application Map, dependency visualization, live metrics, and KQL-based analysis. Microsoft’s Azure Monitor OpenTelemetry distribution adds just enough Azure-specific behavior to support these features without breaking portability.
There is an inevitable trade-off. Some Azure features expect certain attributes or span types to be present. That adds a bit of complexity to the pipeline. But the important point is that the core instrumentation remains standard. Teams keep control over their data and still get the benefits of deep Azure integration.
1.2 The “Three Pillars” in an Azure Context: How Traces, Metrics, and Logs map to Azure Monitor tables
OpenTelemetry defines three primary signal types: traces, metrics, and logs. Azure Monitor stores these signals in different tables, but the mapping is consistent and predictable. Understanding this mapping makes it much easier to query data, build dashboards, and debug ingestion issues.
| Pillar | OTel Concept | Azure Monitor Table | Notes |
|---|---|---|---|
| Traces | Spans | traces, requests, dependencies | Inbound spans become requests; outbound calls become dependencies |
| Metrics | Measurements | metrics | Includes custom and runtime metrics |
| Logs | Structured records | logs, applicationLogs, exceptions | Placement depends on schema and severity |
Azure Monitor still separates requests and dependencies for historical reasons. The Application Insights experience is built around that distinction. Internally, however, these records map directly to OTel span kinds: server spans for incoming requests and client spans for outbound calls.
For engineers, this matters when writing KQL. Knowing which table holds which signal makes joins faster, queries simpler, and investigations more predictable—especially when correlating traces with logs or metrics during an incident.
1.3 Architecture Overview
Once instrumentation is in place, the next decision is how telemetry moves from your application to Azure Monitor. Azure supports two main approaches: exporting directly from application code or sending telemetry through an OpenTelemetry Collector.
1.3.1 Direct Exporters vs. The OpenTelemetry Collector pattern
With a direct exporter, the application sends telemetry straight to Azure Monitor. In .NET, this can be as simple as:
services.AddOpenTelemetry().UseAzureMonitor();This model works well for smaller systems, early-stage projects, or applications running on Azure App Service where infrastructure is tightly controlled. It is easy to set up and has very little operational overhead.
However, direct exporters come with limits:
- batching and retries use application CPU and memory
- every service must implement its own filtering and redaction
- routing telemetry to multiple backends is awkward
- sampling decisions are decentralized
The OpenTelemetry Collector addresses these issues by moving telemetry processing out of application code. Applications send telemetry using the OTLP protocol, and the Collector handles everything else.
A typical Collector configuration looks like this:
receivers:
  otlp:
    protocols:
      http:

processors:
  batch:
  attributes:
    actions:
      - key: tenant_id
        action: delete

exporters:
  azuremonitor:
    instrumentation_key: ${APPINSIGHTS_KEY}

service:
  pipelines:
    traces:
      receivers: [otlp]
      processors: [batch, attributes]
      exporters: [azuremonitor]
This approach allows teams to change sampling rules, redact sensitive data, or add new destinations without redeploying applications. For larger systems, the Collector quickly becomes the preferred pattern.
1.3.2 W3C TraceContext standards: The glue holding microservices together
None of this works unless trace context flows correctly between services. OpenTelemetry relies on the W3C TraceContext standard, which defines two HTTP headers:
traceparenttracestate
In .NET, the Activity API handles these headers automatically. Incoming requests create Activities from incoming headers, and outgoing requests inject the current context. Azure services such as API Management, Application Gateway, and the Azure SDKs all understand these headers as well.
The result is consistent trace continuity across boundaries. A request that starts in a browser, flows through an API, triggers a Service Bus message, and finishes in a background worker still shares a single trace ID. Azure Monitor can visualize this entire path in the Application Map and distributed trace views, giving teams a true end-to-end picture of system behavior.
2 Core Instrumentation: Wiring up the .NET Backend
Once the architecture and telemetry flow are clear, the next step is wiring up the .NET backend itself. This is where theory becomes concrete. Instrumentation is not about collecting as much data as possible—it is about collecting the right data in a way that stays consistent as the system grows. On Azure, the Azure Monitor OpenTelemetry distribution provides a solid starting point because it combines OpenTelemetry standards with Azure-specific defaults that work well out of the box.
The goal of this section is simple: get high-quality traces, metrics, and logs from a .NET service with minimal effort, while leaving room to evolve toward more advanced setups later.
2.1 The Azure Monitor OpenTelemetry Distro
Microsoft ships an OpenTelemetry distribution specifically tuned for Azure Monitor. It wraps the core OpenTelemetry SDK with sensible defaults: automatic instrumentation for common .NET components, resource detection for Azure environments, and exporters that understand Azure Monitor’s ingestion model. For most services, this removes the need to assemble and tune an OTel pipeline manually.
The distribution is not a fork of OpenTelemetry. It follows upstream OTel APIs and semantics, which means anything you build on top of it remains portable.
2.1.1 Installing Azure.Monitor.OpenTelemetry.AspNetCore
Start by adding the package:
dotnet add package Azure.Monitor.OpenTelemetry.AspNetCoreThen register it during application startup:
builder.Services.AddOpenTelemetry()
    .UseAzureMonitor();
That single line enables a surprising amount of functionality:
- inbound ASP.NET Core request spans
- outbound HTTP and Azure SDK dependency spans
- correlation between
ILoggerlogs and traces - automatic detection of service name, environment, and Azure region
At this point, your service already emits traces that appear in Application Insights, show up in the Application Map, and correlate with downstream dependencies—without writing any custom tracing code.
2.1.2 One-line initialization vs. granular configuration
The one-line setup is intentional. Most teams should start there. It reduces friction and avoids early over-optimization. But real systems eventually need more control. As soon as you want to tune sampling, add database or cache instrumentation, or prepare for a Collector-based pipeline, you will want to configure the providers explicitly.
A more detailed configuration looks like this:
builder.Services.AddOpenTelemetry()
    .WithTracing(t =>
    {
        t.AddAspNetCoreInstrumentation();
        t.AddHttpClientInstrumentation();
        t.AddSource("MyApp");
    })
    .WithMetrics(m =>
    {
        m.AddAspNetCoreInstrumentation();
        m.AddRuntimeInstrumentation();
    })
    .UseAzureMonitor(o =>
    {
        o.ConnectionString =
            builder.Configuration["APPLICATIONINSIGHTS_CONNECTION_STRING"];
    });
This approach makes sense when:
- you need custom sampling rules
- you want to add Redis, SQL, or gRPC instrumentation
- certain endpoints (like health checks) should be excluded
- you are preparing to send telemetry to an OpenTelemetry Collector instead of directly to Azure
The key point is that you are still using the same OpenTelemetry APIs. The difference is control, not capability.
2.2 Enriching Telemetry (Resource Detectors)
Traces and logs are only useful if you can tell where they came from. Resource attributes answer that question. They describe the service, environment, and infrastructure that produced the telemetry. Without them, traces from different services blur together, especially in shared Azure environments.
2.2.1 Automatically capturing Environment, Region, and Service Versions
The Azure Monitor distribution automatically populates common resource attributes, including:
service.nameservice.namespacecloud.regiondeployment.environment
These values come from the hosting environment, configuration, and Azure metadata. You can inspect or override them using the ResourceBuilder:
builder.Services.AddOpenTelemetry()
    .ConfigureResource(rb =>
    {
        rb.AddService(
            serviceName: "CheckoutService",
            serviceVersion: "2.1.0",
            serviceInstanceId: Environment.MachineName);
    })
    .UseAzureMonitor();
Azure Monitor uses these attributes to group services in the Application Map and to distinguish deployments in trace views. Without this metadata, troubleshooting across environments quickly becomes confusing.
2.2.2 Using ResourceBuilder to tag telemetry for Blue/Green deployments
When running multiple versions of a service side by side, deployment context becomes critical. If a regression appears, you need to know which version caused it. Adding deployment-specific attributes makes that possible:
rb.AddAttributes(new Dictionary<string, object>
{
    ["deployment.color"] =
        Environment.GetEnvironmentVariable("DEPLOYMENT_COLOR"),
    ["build.sha"] =
        Environment.GetEnvironmentVariable("GIT_SHA")
});
With these tags in place, Azure Monitor Workbooks can easily filter or compare telemetry between Blue and Green deployments. This turns observability data into a deployment validation tool, not just a debugging aid.
2.3 Handling Structured Logging
Traces show where time is spent. Logs explain what happened. In production systems, logs often contain the most important domain-level information—order IDs, tenant identifiers, decision points, and error details. The challenge is keeping logs correlated with traces without adding manual plumbing everywhere.
2.3.1 Integrating ILogger with OTel
.NET’s logging abstractions already support structured logging. OpenTelemetry builds on that by capturing logs and automatically enriching them with trace context. To enable this, register the OpenTelemetry logger provider:
builder.Logging.ClearProviders();
builder.Logging.AddOpenTelemetry(o =>
{
    o.IncludeScopes = true;
    o.ParseStateValues = true;
});
From this point on, logs emitted through ILogger participate in the same context as traces and metrics. There is no need to manually pass correlation IDs through method calls.
2.3.2 Log Correlation: Ensuring every log line has a TraceId and SpanId
When a request is being traced, Activity.Current holds the active span context. The OpenTelemetry logger provider automatically reads that context and attaches it to each log record. A typical log entry now looks like this:
{
  "timestamp": "2025-01-12T12:33:10Z",
  "message": "Processing order",
  "traceId": "c5d9f3b0214a0c5fb31f8a046c42ce90",
  "spanId": "8e4f1d3e17bf7b24",
  "orderId": "12345"
}
This makes logs navigable from traces and vice versa. An engineer can start with a failed request, jump to the associated logs, and immediately see domain-specific context without guessing which log lines belong together.
2.3.3 Reducing noise: Filtering log levels at the provider source
Logs are often the largest source of telemetry volume. Framework-level debug logs rarely help during incidents but can drive up ingestion costs. Filtering at the provider level keeps signal high and noise low:
builder.Logging.AddFilter("Microsoft.AspNetCore", LogLevel.Warning);
builder.Logging.AddFilter("System.Net.Http", LogLevel.Error);
This preserves application logs and important framework warnings while dropping verbose internal messages. The result is cleaner traces, faster queries, and lower telemetry costs—without losing information that actually matters in production.
3 Advanced Distributed Tracing: Beyond HTTP
HTTP requests are only the visible edge of most production systems. In real workloads, requests trigger messages, background jobs, scheduled tasks, and database work that may execute minutes or even hours later. When something goes wrong in these paths, the lack of a continuous trace is usually what slows teams down the most. Logs exist, messages were processed, and jobs ran—but none of it is connected.
OpenTelemetry gives you the tools to extend tracing beyond HTTP so that asynchronous work still belongs to the same end-to-end story. This section focuses on the patterns that tend to cause the most confusion in practice and shows how to make them observable without overengineering.
3.1 Asynchronous Messaging Patterns (The Hard Part)
Asynchronous messaging is where distributed tracing usually breaks down. Unlike HTTP, message brokers do not automatically forward headers, and processing often happens on different machines at different times. If you do nothing, message handlers show up as isolated traces with no connection to the original request.
To keep trace continuity, you must explicitly propagate context when publishing messages and restore that context when consuming them.
3.1.1 Propagating context over Azure Service Bus and Event Hubs
The Azure SDK already creates spans when messages are sent and received. What it does not do automatically is carry the trace context inside the message itself. That part is your responsibility.
When publishing a message, inject the current activity context into message properties:
var activity = Activity.Current;

propagation.Inject(
    new PropagationContext(activity.Context, Baggage.Current),
    message.ApplicationProperties,
    (properties, key, value) => properties[key] = value
);
On the consumer side, extract that context and start a new activity using it as the parent:
var parentContext = propagation.Extract(
    default,
    message.ApplicationProperties,
    (properties, key) =>
        properties.TryGetValue(key, out var value)
            ? value?.ToString()
            : null
);

using var activity = MyActivitySource.StartActivity(
    "ProcessMessage",
    ActivityKind.Consumer,
    parentContext.ActivityContext
);
With this in place, Azure Monitor shows message publishing, queue latency, and message processing as part of the same distributed trace. You can now answer questions like: Which request caused this message? How long did it wait in the queue? Where did it fail?
3.1.2 Instrumenting MassTransit or NServiceBus consumers
If you use a messaging framework, much of this work is already done for you—but only if you enable it correctly.
MassTransit integrates directly with OpenTelemetry:
services.AddMassTransit(x =>
{
    x.AddOpenTelemetry();
});
This automatically propagates trace context and creates spans around message handling.
NServiceBus requires explicit configuration because it manages its own pipelines. A simple behavior that restores the parent context looks like this:
public class OpenTelemetryBehavior : Behavior<IIncomingLogicalMessageContext>
{
    public override Task Invoke(
        IIncomingLogicalMessageContext context,
        Func<Task> next)
    {
        if (context.Headers.TryGetValue("traceparent", out var parent))
        {
            var activity = new Activity("NServiceBusHandler");
            activity.SetParentId(parent);
            activity.Start();

            return next().ContinueWith(_ => activity.Stop());
        }

        return next();
    }
}
Once configured, message handlers stop appearing as “mystery operations” and become part of the same trace tree as the originating request.
3.1.3 Visualizing “Links” in the Application Insights Transaction Map (Parent vs. Linked Spans)
Some workflows do not fit a strict parent-child model. Batch processing is a common example. A worker may process ten messages together, each originating from a different request. In these cases, choosing a single parent span would be misleading.
OpenTelemetry solves this with links. A span can link to multiple upstream contexts without claiming direct parentage:
var link = new ActivityLink(previousActivity.Context);

using var activity = Source.StartActivity(
    "BatchProcess",
    ActivityKind.Internal,
    default,
    links: new[] { link }
);
Azure Monitor visualizes these links in transaction maps, showing convergence points where multiple flows come together. This is especially useful for Event Hub consumers, batch jobs, and stream processors.
3.2 Database and Cache Instrumentation
Databases and caches are often where latency hides. A slow query or cache miss can ripple through the system, but without tracing, those delays are easy to misattribute to upstream services. Instrumentation makes database behavior visible in the same traces as API calls and background work.
3.2.1 Deep dive into Entity Framework Core instrumentation options
Entity Framework Core integrates with OpenTelemetry through diagnostic listeners. Enabling it is straightforward:
builder.Services.AddOpenTelemetry()
    .WithTracing(t =>
    {
        t.AddEntityFrameworkCoreInstrumentation(options =>
        {
            options.SetDbStatementForText = false;
        });
    });
The important decision here is how much detail to capture. Including full SQL statements can help during debugging but may expose sensitive data. Disabling SQL text reduces risk but also reduces insight.
A common compromise is to capture metadata—operation type, database name, and duration—without logging parameter values. This keeps traces safe and still useful.
3.2.2 Tracing Redis calls with StackExchange.Redis
Cache behavior often explains why database load suddenly spikes. Redis instrumentation captures cache hits, misses, and latency so those patterns are visible.
services.AddOpenTelemetry()
    .WithTracing(t =>
    {
        t.AddRedisInstrumentation(options =>
        {
            options.FlushInterval = TimeSpan.FromSeconds(1);
        });
    });
In Azure Monitor, Redis calls appear as dependency spans. When cache latency increases or misses become frequent, you can immediately see the downstream impact on database queries and request latency.
3.2.3 Sanitizing DB statements to prevent PII leakage in SQL command text
If you do capture command details, always sanitize them before export. A simple enrichment callback can remove sensitive data while preserving structure:
options.Enrich = (activity, command) =>
{
    activity.SetTag("db.operation", command.CommandType.ToString());
    activity.SetTag("db.name", command.Connection.Database);
    activity.SetTag("db.statement", "[REDACTED]");
};
This ensures traces remain safe to share with broader teams and comply with security and compliance requirements.
3.3 Handling Background Jobs
Background jobs are easy to forget when instrumenting a system because they are not triggered by HTTP requests. But from an operational perspective, they are just as important. When background work fails silently, it often surfaces later as missing data or delayed processing.
3.3.1 Instrumenting IHostedService and Worker Services
For long-running workers, the simplest approach is to wrap each unit of work in an activity:
public class EmailJob : BackgroundService
{
    protected override async Task ExecuteAsync(CancellationToken token)
    {
        while (!token.IsCancellationRequested)
        {
            using var activity =
                MyActivitySource.StartActivity(
                    "EmailJob.Execute",
                    ActivityKind.Internal
                );

            await ProcessEmails();
        }
    }
}
Each execution cycle now appears as a traceable operation. If the job throws an exception or slows down, that behavior is visible in Azure Monitor alongside the rest of the system.
3.3.2 Manually creating Activities for non-HTTP triggers
Some triggers do not come from ASP.NET at all: timers, file watchers, or external callbacks. In these cases, you create activities manually.
For scheduled jobs:
using var activity =
    MySource.StartActivity(
        "TimerTrigger",
        ActivityKind.Producer
    );
For callbacks where you already have a trace context:
var context = ActivityContext.CreateFromW3C(
    traceId,
    spanId,
    ActivityTraceFlags.Recorded
);

using var activity =
    Source.StartActivity(
        "ExternalEvent",
        ActivityKind.Server,
        context
    );
The key idea is consistency. Every meaningful unit of work should either continue an existing trace or start a new one explicitly. When that discipline is applied consistently, Azure Monitor can show a complete, end-to-end view of system behavior—even when execution jumps across protocols, processes, and time.
4 Full-Stack Context: Connecting TypeScript Clients
By this point, the backend is well instrumented. Requests flow through APIs, queues, background jobs, databases, and caches with trace continuity intact. But there is still a blind spot: the user. From the user’s perspective, everything starts in the browser. If the page feels slow or broken, backend traces alone rarely explain why.
Frontend observability fills that gap. It extends the trace to where latency and errors are first experienced, then carries that context into the backend. When done correctly, a single trace can show a slow page load, the API call it triggered, the message it enqueued, and the database query that ultimately caused the delay. This section focuses on wiring up TypeScript-based clients so browser activity and backend operations become part of the same story.
4.1 The Frontend Gap: Why server-side tracing isn’t enough
Browsers are unpredictable environments. Two users can hit the same endpoint and see very different performance due to network conditions, device speed, browser behavior, or cached assets. A page that takes two seconds to load might be waiting on JavaScript execution, a blocked render, a slow CDN edge, or an API call that is perfectly healthy on the server.
Without frontend telemetry, backend teams often chase the wrong problems. APIs look fast, databases look fine, and nothing obvious stands out. Meanwhile, users continue to report slowness that engineers cannot reproduce. Frontend errors make this worse—JavaScript exceptions often never reach the server at all.
By instrumenting the browser with OpenTelemetry, you capture what the user actually experiences: page load timing, network requests, resource downloads, and client-side errors. When those browser spans propagate trace context to the backend, Azure Monitor can stitch everything together. An on-call engineer can start with a slow page load and follow the trace through API calls, message processing, and database dependencies until the real bottleneck becomes obvious.
4.2 Instrumenting the Browser
Browser instrumentation needs to be lightweight. Unlike backend services, the browser runs on the user’s device, so overhead matters. The OpenTelemetry JavaScript SDKs are designed for this environment and allow you to be selective about what you collect. Azure Monitor builds on top of these SDKs to add exception tracking and dependency correlation without requiring custom code in every request.
4.2.1 Using @opentelemetry/sdk-trace-web and @azure/monitor-opentelemetry
A typical setup starts by installing the core OpenTelemetry packages along with the Azure Monitor browser exporter:
npm install @opentelemetry/api \
            @opentelemetry/sdk-trace-web \
            @opentelemetry/instrumentation-fetch \
            @opentelemetry/instrumentation-xml-http-request \
            @azure/monitor-opentelemetry-browser
You then initialize tracing early in your application startup:
import { WebTracerProvider } from "@opentelemetry/sdk-trace-web";
import { BatchSpanProcessor } from "@opentelemetry/sdk-trace-base";
import { AzureMonitorTraceExporter } from "@azure/monitor-opentelemetry-browser";
import { registerInstrumentations } from "@opentelemetry/instrumentation";
import { FetchInstrumentation } from "@opentelemetry/instrumentation-fetch";
import { XMLHttpRequestInstrumentation } from "@opentelemetry/instrumentation-xml-http-request";
import { Resource } from "@opentelemetry/resources";

const provider = new WebTracerProvider({
  resource: new Resource({
    "service.name": "web-portal",
    "deployment.environment": "prod"
  })
});

provider.addSpanProcessor(
  new BatchSpanProcessor(
    new AzureMonitorTraceExporter({
      connectionString: "InstrumentationKey=XXXX"
    })
  )
);

provider.register();

registerInstrumentations({
  instrumentations: [
    new FetchInstrumentation(),
    new XMLHttpRequestInstrumentation()
  ]
});
This mirrors what you did on the backend: define a service identity, enable automatic instrumentation, and export spans to Azure Monitor. Because the resource attributes match backend services, Azure Monitor treats frontend spans as first-class participants in distributed traces.
4.2.2 Auto-instrumenting fetch and XHR requests
Most modern frontend code uses fetch, but many frameworks and older codebases still rely on XMLHttpRequest. Auto-instrumentation covers both, ensuring consistent behavior regardless of how requests are made.
For example, this simple API call:
await fetch("/api/orders/123");Automatically produces a span with attributes such as:
http.methodhttp.urlhttp.status_codehttp.user_agent
That span becomes a dependency of the page load or user interaction that triggered it. When the request reaches the backend, the traceparent header is already present, so the server continues the same trace. There is no manual correlation logic and no custom headers to manage.
This consistency is what makes frontend tracing maintainable. Developers write normal application code, and observability stays out of the way.
4.3 Context Propagation to Backend
Frontend and backend traces only connect if trace context flows correctly across the network. OpenTelemetry uses the W3C TraceContext standard, which relies on HTTP headers. If those headers are dropped or overwritten, traces split and the end-to-end view disappears.
4.3.1 Ensuring the traceparent header is correctly injected into API calls
In most cases, the OpenTelemetry instrumentation handles header injection automatically. Problems usually arise when applications introduce custom HTTP clients or interceptors. Libraries like Axios, React Query, or custom fetch wrappers may override headers unintentionally.
A defensive Axios interceptor looks like this:
import { context, trace } from "@opentelemetry/api";

axios.interceptors.request.use(config => {
  const span = trace.getSpan(context.active());
  if (span) {
    const spanContext = span.spanContext();

    config.headers = {
      ...config.headers,
      traceparent: `00-${spanContext.traceId}-${spanContext.spanId}-01`
    };
  }
  return config;
});
This ensures that even custom HTTP abstractions preserve trace context. The backend then sees the same trace ID and continues the trace naturally.
4.3.2 Handling CORS issues with trace headers
Browsers enforce CORS rules strictly. If the server does not allow the traceparent and tracestate headers, the browser may block requests or silently strip headers. This often leads to “missing” frontend traces that are difficult to diagnose.
The backend API must explicitly allow these headers:
builder.Services.AddCors(options =>
{
    options.AddPolicy("default", policy =>
    {
        policy.AllowAnyOrigin()
              .AllowAnyMethod()
              .WithHeaders("Content-Type", "traceparent", "tracestate");
    });
});
This small configuration step is easy to overlook, but without it, frontend and backend telemetry never truly connect.
4.4 Real User Monitoring (RUM): correlating page load performance with backend API latency
Tracing network requests is only part of the frontend story. Users also care about rendering time, layout shifts, and long-running JavaScript tasks. Real User Monitoring (RUM) captures these signals and ties them back to backend activity.
Azure Monitor’s browser SDK can enable RUM features with minimal configuration:
import { AzureMonitorWeb } from "@azure/monitor-opentelemetry-browser";

new AzureMonitorWeb({
  connectionString: "InstrumentationKey=XXXX",
  enableAutoRouteTracking: true,
  enableRequestTracking: true
});
This adds telemetry for:
- page load performance linked to backend requests
- frontend dependency timings correlated with server-side spans
- JavaScript exceptions associated with the user session
When a user reports that “the page is slow,” engineers can now see whether the delay comes from rendering, network calls, or backend processing. The trace tells the full story, from the browser to the database and back.
5 Infrastructure Integration: AKS and App Service
At this point, application code is well instrumented and traces flow cleanly across services. But production incidents are rarely caused by code alone. They often involve infrastructure behavior: pods being rescheduled, nodes running out of CPU, containers restarting, or platforms throttling requests. If those signals live in a separate silo, teams see what failed but not why.
Azure’s value here is that infrastructure telemetry can be correlated with OpenTelemetry-based application data. When this integration is done correctly, a slow request can be traced all the way from the browser, through application code, down to a pod running hot on a specific node. This section explains how that works in AKS and App Service environments.
5.1 Azure Kubernetes Service (AKS)
AKS produces a large volume of telemetry by design. Kubernetes emits node metrics, pod lifecycle events, controller logs, and container output continuously. On their own, these signals are noisy. The key is correlation. Azure Monitor ingests Kubernetes telemetry into Kusto tables and links it to application traces through shared resource metadata such as pod name, namespace, and container ID.
5.1.1 Scraping Prometheus metrics with Azure Monitor Managed Service for Prometheus
Many .NET services already expose Prometheus metrics using libraries like prometheus-net. Azure Monitor’s Managed Service for Prometheus can scrape these endpoints without requiring you to operate your own Prometheus cluster.
A simple metrics endpoint in a .NET service looks like this:
app.MapMetrics();To tell Azure Monitor where to scrape, you define a PodMonitor:
apiVersion: monitor.azure.com/v1
kind: PodMonitor
metadata:
  name: checkoutservice
spec:
  selector:
    matchLabels:
      app: checkoutservice
  endpoints:
    - port: http
      path: /metrics
Once configured, metrics such as request rates, memory usage, or GC activity appear in Azure Monitor alongside application traces. This makes it possible to answer questions like: Did latency increase because the code changed, or because the pod was CPU-throttled?
5.1.2 Correlation between K8s Pod logs and Application Traces
Container logs often reveal problems that never make it into structured application logs—startup failures, configuration warnings, or runtime errors printed to stdout. Azure Monitor associates these logs with Kubernetes metadata including:
- pod name
- namespace
- node name
When you use the OpenTelemetry logging provider in .NET, trace IDs and span IDs are automatically included in stdout logs. That enables a practical troubleshooting flow:
- Find a slow or failed trace in Application Insights.
- Identify the pod that handled the request.
- Pivot to container logs for that pod and time range.
- Look for warnings, restarts, or resource errors that explain the behavior.
This cross-layer view is especially important in autoscaled environments, where problematic pods may be terminated before engineers can inspect them manually.
5.2 The Sidecar Pattern (OTel Collector)
As systems grow, sending telemetry directly from every pod to Azure Monitor becomes harder to manage. The OpenTelemetry Collector acts as a local control plane, handling batching, retries, filtering, and redaction outside of application code. In AKS, the Collector is commonly deployed either as a sidecar or as a DaemonSet.
5.2.1 When to use the OTel Collector as a sidecar or daemonset in AKS
A sidecar Collector runs alongside a single application container. This model works well when:
- teams want strict isolation between services
- different services require different processing rules
- compliance rules require telemetry to be handled inside the pod
A DaemonSet Collector runs once per node and serves all pods on that node. This is usually the better choice when:
- all services share the same export configuration
- node-level batching improves performance
- telemetry needs to be aggregated before leaving the cluster
A simple sidecar setup in a Deployment might look like this:
containers:
  - name: checkoutservice
    image: myregistry/checkout:latest
    env:
      - name: OTEL_EXPORTER_OTLP_ENDPOINT
        value: "http://otel-collector:4318"
  - name: otel-collector
    image: otel/opentelemetry-collector:latest
    volumeMounts:
      - name: collector-config
        mountPath: /etc/otel/config.yaml
With this pattern, you can change sampling or redaction rules by updating the Collector configuration—no application redeploy required.
5.2.2 Offloading processing: Batching, Retries, and Attribute redaction before data leaves the cluster
One of the biggest benefits of the Collector is that it centralizes telemetry processing. Common processors include batching, memory limiting, and attribute filtering:
processors:
  attributes:
    actions:
      - key: user.email
        action: delete
  batch:
    timeout: 5s
  memory_limiter:
    limit_mib: 512
Exporters can also handle retries in a controlled way:
exporters:
  azuremonitor:
    retry_on_failure:
      enabled: true
      max_elapsed_time: 120s
This setup protects application pods from transient network issues and ensures sensitive data is removed before telemetry leaves the cluster. It also reduces ingestion cost by batching telemetry efficiently.
5.3 App Service Specifics
App Service abstracts away much of the infrastructure, which simplifies operations but changes how observability works. Teams must choose between platform-level auto-instrumentation and explicit instrumentation in application code.
5.3.1 Using the “Application Insights Agent” vs. In-process Code Instrumentation
App Service can inject an Application Insights Agent at runtime with no code changes. This is useful for legacy applications or quick enablement, but it comes with trade-offs:
- no custom metrics
- limited control over sampling
- minimal support for domain-specific attributes
- no direct access to custom
ActivitySources
In-process instrumentation using the Azure Monitor OpenTelemetry distribution avoids these limitations. Developers control what gets traced, how spans are enriched, and which metrics are emitted. A typical App Service setup looks like this:
builder.Services.AddOpenTelemetry()
    .WithTracing(t =>
    {
        t.AddAspNetCoreInstrumentation();
        t.AddHttpClientInstrumentation();
        t.AddSource("OrderService");
    })
    .UseAzureMonitor();
Many teams migrate gradually. They start with the App Service agent for baseline visibility, then add in-process OpenTelemetry for critical business paths. Over time, the agent becomes unnecessary because the native OTel pipeline provides richer data and more predictable behavior.
6 SRE-Grade Metrics and Custom Telemetry
Traces tell you what happened to a specific request. Logs tell you why something failed. Metrics answer a different question: Is the system healthy over time? They scale better than any other signal and are the foundation for alerting, capacity planning, and SLOs.
Many teams stop at default HTTP metrics like request count and latency. Those are useful, but they only describe the transport layer. They do not tell you whether orders are completing, queues are backing up, or specific customers are having a bad experience. SRE-grade observability means measuring the behavior that actually matters to the business. In .NET, System.Diagnostics.Metrics combined with OpenTelemetry makes it possible to do this with very little overhead.
6.1 Moving beyond “Request Duration”
Request duration is easy to measure, but it is rarely the metric users care about. A request can be fast and still fail. It can be slow but acceptable. What matters is whether the system is doing the right thing consistently.
This is where Service Level Indicators (SLIs) come in. SLIs describe outcomes: orders completed, payments authorized, messages processed, or emails sent. These are the signals SRE teams use to define SLOs and decide when to page someone.
6.1.1 Defining SLIs (Service Level Indicators) specific to business logic
SLIs work best when they are explicit and close to the code that implements the behavior. In a checkout service, a basic SLI might be order completion success rate. Instead of inferring this from HTTP status codes, you can measure it directly:
static readonly Meter OrderMeter = new("CheckoutService");
static readonly Counter<int> OrdersCompleted =
    OrderMeter.CreateCounter<int>("orders.completed");
static readonly Counter<int> OrdersFailed =
    OrderMeter.CreateCounter<int>("orders.failed");

public async Task ProcessOrderAsync(Order order)
{
    try
    {
        await _processor.Handle(order);
        OrdersCompleted.Add(
            1,
            new KeyValuePair<string, object?>("tenant", order.TenantId)
        );
    }
    catch
    {
        OrdersFailed.Add(
            1,
            new KeyValuePair<string, object?>("tenant", order.TenantId)
        );
        throw;
    }
}
This makes business health visible in a way HTTP metrics never could. You can now ask questions like: Which tenants see the most failures? Did a deployment change completion rates? Are retries masking real problems? Over time, these SLIs become the basis for meaningful SLOs and operational reviews.
6.2 Implementing System.Diagnostics.Metrics
The System.Diagnostics.Metrics API is designed for production use. It follows OpenTelemetry conventions, integrates directly with Azure Monitor, and avoids per-event overhead by aggregating data before export. You define instruments once and record values as your code runs.
The key is choosing the right instrument for the job: counters for totals, histograms for distributions, and UpDownCounters for values that rise and fall.
6.2.1 Creating Histograms for business processing time
Histograms are essential for understanding latency beyond averages. Averages hide outliers, and outliers are usually what users notice. Histograms capture the full distribution so you can ask percentile-based questions.
For example, measuring how long order validation takes:
static readonly Meter ValidationMeter = new("CheckoutService");
static readonly Histogram<long> ValidationDuration =
    ValidationMeter.CreateHistogram<long>(
        "order.validation.duration",
        unit: "ms"
    );

public async Task ValidateAsync(Order order)
{
    var sw = Stopwatch.StartNew();
    await _validator.Validate(order);
    sw.Stop();

    ValidationDuration.Record(
        sw.ElapsedMilliseconds,
        new KeyValuePair<string, object?>("tenant", order.TenantId)
    );
}
In Azure Monitor, this enables queries like P90 or P99 validation time. When performance regresses, percentile metrics usually show it long before averages do.
6.2.2 Creating Up/Down Counters for queue depth or active users
Some values go up and down over time. Queue depth, active sessions, or in-flight jobs are good examples. UpDownCounters model these naturally.
For a background worker pulling from a queue:
static readonly Meter WorkerMeter = new("QueueWorker");
static readonly UpDownCounter<int> QueueDepth =
    WorkerMeter.CreateUpDownCounter<int>("queue.depth");

public void UpdateQueueDepth(int depth)
{
    QueueDepth.Add(depth);
}
For tracking connected users:
static readonly UpDownCounter<int> ActiveSessions =
    WorkerMeter.CreateUpDownCounter<int>("sessions.active");

public void OnConnected() => ActiveSessions.Add(1);
public void OnDisconnected() => ActiveSessions.Add(-1);
These metrics are especially useful for scaling decisions. A growing queue depth combined with stable request rates often points to downstream bottlenecks.
6.2.3 Multi-dimensional metrics: Tagging metrics with TenantId or PricingTier
Tags make metrics more powerful by allowing segmentation. For example, tagging by tenant or pricing tier lets you see whether certain customers consistently experience worse performance.
ProcessingDuration.Record(
    sw.ElapsedMilliseconds,
    new("tenant", order.TenantId),
    new("pricing_tier", order.PricingTier)
);
This enables targeted questions such as:
- Are premium customers getting the performance they pay for?
- Is one tenant generating disproportionate load?
The important rule is restraint. Tags should have bounded cardinality. Tenant tiers are fine; user IDs are not. Used carefully, dimensions add clarity instead of noise.
6.3 Metric Aggregation
Unlike traces, metrics are not exported one event at a time. They are aggregated over time windows. This is what makes them efficient and affordable at scale.
Aggregation can happen in the SDK, in the OpenTelemetry Collector, or both. Understanding where it happens helps you control cost without losing insight.
6.3.1 Understanding pre-aggregation to reduce ingestion costs
The Azure Monitor OpenTelemetry distribution aggregates metrics before sending them. Counters become deltas over time buckets. Histograms are exported as bucket counts rather than raw values. This dramatically reduces ingestion volume.
For example, a histogram recording thousands of validation timings per minute might export only a small set of bucket values. You still get accurate percentiles, but at a fraction of the cost.
You can further control aggregation in the OTel Collector:
processors:
  metricstransform:
    transforms:
      - include: order.validation.duration
        action: aggregate_labels
        label_set: ["tenant"]
This configuration collapses all other labels while keeping tenant-level visibility. It prevents accidental high-cardinality metrics while preserving the dimensions you care about most.
When applied intentionally, aggregation turns metrics into a long-term signal you can afford to keep, query, and alert on—without overwhelming your observability budget.
7 Turning Data into Action: KQL, Dashboards, and Alerts
Instrumentation and metrics only matter if they change how teams operate. When an incident happens, nobody wants to scroll through raw tables or guess which signal matters. The goal is to move from “we collected data” to “we know what’s broken and why.” Azure Monitor’s querying, visualization, and alerting tools are designed for exactly that workflow.
This section focuses on how traces, metrics, and logs come together during real investigations. The examples build directly on the checkout and order-processing scenarios used earlier, showing how to turn telemetry into something actionable for on-call engineers.
7.1 Kusto Query Language (KQL) Masterclass
KQL is the glue that holds Azure Monitor together. It is optimized for time-series telemetry and makes it practical to correlate requests, dependencies, traces, and logs at scale. Once you understand a few core patterns, KQL becomes less about writing queries and more about asking the right questions.
7.1.1 Joining requests, dependencies, and traces tables efficiently
Most investigations start with a symptom: slow requests, failed operations, or timeouts. From there, you want to know what those requests depended on. The key is to reduce the dataset early, then join.
For example, to investigate slow checkout requests:
let slowRequests = requests
| where duration > 2s
| project operation_Id, name, duration;

slowRequests
| join kind=leftouter dependencies on operation_Id
| project
    operation = name,
    dependency = dependencies.name,
    dependencyDuration = dependencies.duration,
    totalDuration = duration
This shows which downstream dependencies contributed most to the overall latency. Because the query filters to slow requests first, it stays fast even in high-traffic systems.
To include application-level context from traces:
requests
| where timestamp > ago(1h)
| where resultCode != "200"
| join kind=leftouter traces on operation_Id
| project
    operation = name,
    message = traces.message,
    severityLevel
This pattern is especially useful when failures are logged as warnings or errors inside business logic rather than as HTTP 500s.
7.1.2 Writing queries to detect the “Slowest 5% of customers”
Averages hide pain. Percentiles expose it. When metrics and traces are tagged with tenant or customer information, KQL makes it easy to identify who is having the worst experience.
To find tenants with the highest P95 latency:
requests
| summarize
    p95 = percentile(duration, 95)
    by tenant = tostring(customDimensions.tenant)
| top 10 by p95 desc
This immediately highlights customers who are most affected by performance issues.
To identify the slowest 5% of requests overall:
let threshold =
    requests
    | summarize percentile(duration, 95);

requests
| where duration > threshold
These percentile-based views are far more useful than global averages and form a strong foundation for meaningful alerts.
7.2 Building Azure Workbooks
Queries are powerful, but during incidents, engineers benefit from guided workflows. Azure Workbooks allow teams to package queries, visualizations, and context into a single interactive view. Think of them as living runbooks backed by real telemetry.
7.2.1 Creating interactive troubleshooting guides for on-call engineers
A well-designed workbook mirrors how people debug systems. A common structure looks like this:
- Start with high-level health: request rate, error rate, and latency.
- Drill into failing dependencies.
- Select a specific operation or trace for deeper inspection.
- Correlate with infrastructure metrics or logs.
For example, a dependency health panel might use:
dependencies
| where timestamp > ago(30m)
| summarize
    avgDuration = avg(duration),
    failureRate = countif(success == "False") * 100.0 / count()
    by target
From there, users can click a dependency name to filter the rest of the workbook. This turns the dashboard into an investigation tool rather than a static report.
7.2.2 Visualizing end-to-end flow maps
Application Maps are useful, but complex systems—especially those using messaging—often need more detailed views. Workbooks can build custom flow diagrams by querying trace relationships.
For a single trace:
traces
| where operation_Id == "{TraceId}"
| project
    parent = tostring(customDimensions.parentSpanId),
    child = spanId
Rendered as a graph, this shows how work flowed across services, queues, and background jobs. For asynchronous systems, this view often reveals delays or fan-out patterns that are hard to spot elsewhere.
7.3 Intelligent Alerting
Alerting is where observability either helps or hurts teams. Poorly designed alerts create noise and burnout. Good alerts surface real problems early and give responders enough context to act quickly.
Azure Monitor supports static thresholds, dynamic baselines, and rate-based alerts. The challenge is choosing the right one for each signal.
7.3.1 Dynamic Thresholds vs. Static Thresholds
Static thresholds are simple and predictable. They work well when traffic patterns are stable.
Example:
- Alert when P95 checkout latency exceeds 500ms for 10 minutes.
Dynamic thresholds adjust automatically based on historical behavior. They are better suited to systems with strong daily or weekly patterns.
Example:
- Alert when P95 latency deviates significantly from its normal range.
For customer-facing applications with variable load, dynamic thresholds usually reduce false positives without sacrificing sensitivity.
7.3.2 Alerting on “Rate of Change” instead of absolute values
Some of the most damaging incidents start quietly. Error rates may still be low, but they are rising quickly. Rate-of-change alerts catch these situations early.
requests
| summarize
    errorRate = countif(resultCode != "200") * 100.0 / count()
    by bin(timestamp, 5m)
| extend delta = errorRate - prev(errorRate)
| where delta > 10
This detects sudden increases even if the absolute error rate has not crossed a fixed threshold. These alerts are especially effective during deployments and configuration changes.
7.3.3 Designing Action Groups for PagerDuty and Teams
Action Groups define how alerts are delivered. A layered approach works best:
- PagerDuty for urgent, service-impacting alerts
- Microsoft Teams for anomalies or early warnings
- Email or webhooks for automation and reporting
Critical alerts should include links to relevant dashboards, traces, or Workbooks so responders can jump straight into investigation. It is also important to test Action Groups regularly to ensure throttling or routing rules do not suppress important notifications.
When alerts are tied to clear SLIs and backed by good dashboards, teams spend less time reacting and more time preventing the next incident.
8 Production Readiness: Governance, Cost, and Performance
Once observability is in place and teams rely on it daily, a new set of problems appears. Telemetry volume grows quickly. Costs become visible. And questions start coming from security and compliance teams. This is normal. Production-ready observability is not about collecting everything—it is about collecting what you can afford, what you can trust, and what you can act on.
This section focuses on the guardrails that keep observability sustainable over time: sampling strategies, cost controls, and data governance. These are not afterthoughts. They are what allow observability to scale with the system instead of becoming a liability.
8.1 Sampling Strategies
Sampling controls how many traces you keep. Without it, high-traffic services quickly overwhelm ingestion pipelines and budgets. With poorly chosen sampling, teams lose the very traces they need during incidents. The goal is to reduce volume while preserving the signals that matter most.
Sampling decisions can be made in application code or delegated to the OpenTelemetry Collector. In practice, most mature systems do both: simple defaults in code, smarter logic in the Collector.
8.1.1 Fixed-rate sampling vs. Adaptive Sampling
Fixed-rate sampling keeps a consistent percentage of traces. It is easy to reason about and easy to explain.
For example, keeping 10% of traces:
builder.Services.AddOpenTelemetry()
    .WithTracing(t =>
    {
        t.SetSampler(new TraceIdRatioBasedSampler(0.1));
    });
This works well for high-volume services with steady traffic. You always know roughly how much data you will generate.
Adaptive sampling takes a different approach. Instead of keeping a fixed percentage, it adjusts sampling dynamically to stay within target ingestion limits. Azure Monitor applies adaptive sampling automatically when using its OpenTelemetry distribution. During traffic spikes, it samples more aggressively. During quiet periods, it captures more detail.
The trade-off is predictability versus coverage. Fixed-rate sampling is simple. Adaptive sampling preserves detail when it matters most but can reduce trace volume during peak load. Many teams start with adaptive sampling and introduce fixed-rate rules later for critical paths.
8.1.2 Head-based vs. Tail-based sampling (using the OTel Collector)
Head-based sampling decides whether to keep a trace at the moment it starts. This is efficient but blind to how the trace turns out. If an error happens later, the trace may already be dropped.
Tail-based sampling waits until the trace finishes, then decides. This allows you to keep traces with errors or high latency while discarding routine successes.
A simple tail-based rule that keeps all error traces looks like this:
processors:
  tail_sampling:
    decision_wait: 5s
    policies:
      - name: errors
        type: status_code
        status_code:
          status_codes: ["ERROR"]
Tail-based sampling is especially valuable for asynchronous systems, where failures often occur deep in message handling or background jobs. By placing this logic in the Collector, you keep application code clean and can evolve sampling rules without redeploying services.
8.2 Cost Optimization
Observability costs rarely come from one big mistake. They usually come from many small ones: verbose logs left enabled, health checks traced at high volume, or metrics with unbounded cardinality. Cost optimization is about identifying low-value telemetry and removing it deliberately.
8.2.1 Identifying high-volume, low-value telemetry
The first step is visibility into what you are ingesting. Azure Monitor exposes usage data that makes this straightforward:
_LogUsage
| summarize total = sum(Quantity) by DataType
| sort by total desc
This query quickly highlights which telemetry types consume the most volume. Common offenders include:
- debug or trace-level framework logs
- frequent health check requests
- dependency spans for internal infrastructure calls
Once identified, these signals can usually be filtered, sampled, or aggregated without losing meaningful insight.
8.2.2 Filtering out health check endpoints and synthetic traffic
Health probes and synthetic tests are important, but they rarely help during incident investigations. Tracing every health check just adds noise.
Filtering them at the instrumentation level keeps traces focused on real user traffic:
services.AddOpenTelemetry()
    .WithTracing(t =>
    {
        t.AddAspNetCoreInstrumentation(options =>
        {
            options.Filter = context =>
            {
                var path = context.Request.Path.Value;
                return path != "/health"
                       && !path.StartsWith("/synthetic/");
            };
        });
    });
This single filter often removes a surprising amount of trace volume and makes service maps much easier to read.
8.3 Security and Compliance
Telemetry frequently contains more context than teams realize. Query parameters, user identifiers, and payload fragments can all appear in spans or logs. In regulated environments, this is a serious concern. Production readiness means ensuring sensitive data never leaves the service boundary.
Azure Monitor provides role-based access control and workspace isolation, but data should be sanitized before it is exported whenever possible.
8.3.1 Using telemetry processors to redact PII at the SDK level
OpenTelemetry allows you to intercept and modify telemetry before export. This makes it possible to remove sensitive attributes proactively.
A simple processor that redacts email addresses and credit card fields might look like this:
t.AddProcessor(new SimpleActivityProcessor(new RedactionExporter()));

public class RedactionExporter : BaseExporter<Activity>
{
    public override ExportResult Export(in Batch<Activity> batch)
    {
        foreach (var activity in batch)
        {
            if (activity.TagObjects is not null)
            {
                foreach (var tag in activity.TagObjects)
                {
                    if (tag.Key.Contains("email", StringComparison.OrdinalIgnoreCase)
                        || tag.Key.Contains("credit", StringComparison.OrdinalIgnoreCase))
                    {
                        activity.SetTag(tag.Key, "[REDACTED]");
                    }
                }
            }
        }
        return ExportResult.Success;
    }
}
This approach ensures that sensitive values never reach Azure Monitor, logs, or dashboards. Combined with Collector-level filtering, network controls, and RBAC, it creates a telemetry pipeline that is both observable and compliant.
At scale, this is what separates experimental observability from something you can confidently run in production year after year.