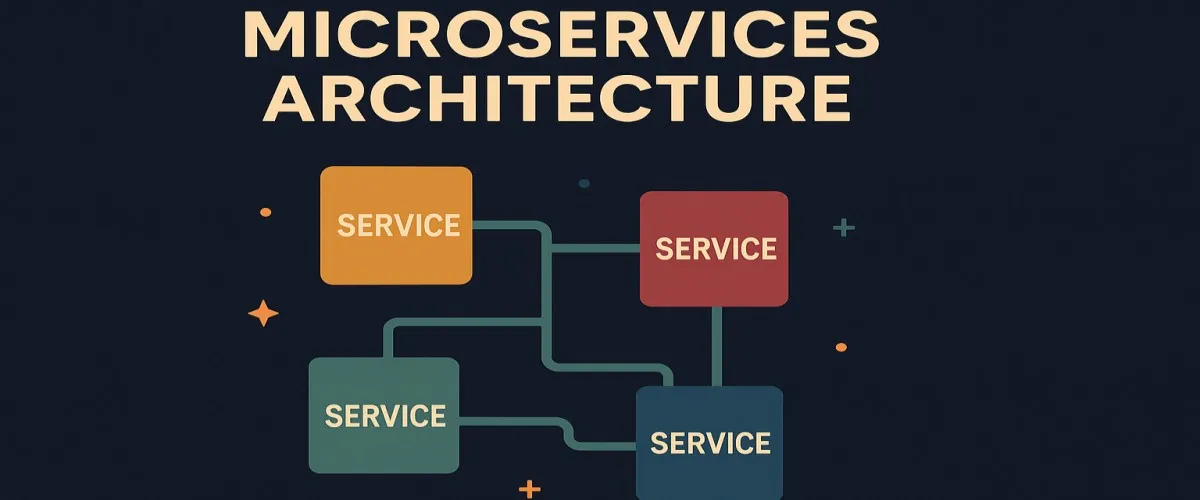
Microservices Everything you Need to Know as Beginner
Ever feel overwhelmed by a huge, tightly-coupled codebase that breaks every time you touch it? Ever wished you could just pick a single piece, tweak it, and redeploy it without bringing down the entire system? Well, welcome to the world of microservices—where software design becomes modular, flexible, and actually manageable.
In this in-depth guide, we’ll demystify microservices, especially for beginners working in Microsoft technologies. If you’re comfy with C# and .NET, you’re exactly where you need to be. We’ll cover everything from fundamentals, through implementation, communication, and storage, to deployment, security, and DevOps. By the end, you’ll be well-equipped to create, manage, and deploy robust microservice-based applications.
Ready? Let’s dive in!
1. Microservices Fundamentals: Why All the Hype?
Monolith vs. Microservices: The Ultimate Showdown
What’s a Monolith, Anyway?
Think of your monolith as one big spaghetti bowl of code. It tastes great at first—but soon enough, you can’t tell where one noodle ends and another begins. One change can mess everything up, and scaling becomes a nightmare.
In tech terms, a monolithic application bundles all functions—UI, business logic, database interactions—into one huge codebase.
Microservices: The Anti-Spaghetti Solution
Now, imagine instead a neatly organized lunchbox with clearly defined compartments. That’s microservices—each service doing just one thing really well, independently deployable, manageable, and scalable.
- Monoliths: Big bowl of spaghetti
- Microservices: Lunchbox with compartments
When (and Why) Should You Use Microservices?
You don’t switch just because it’s trendy. Here’s when microservices really shine:
- Your system is large and complex: Breaking it down simplifies management.
- Rapid deployment: Each service can be deployed independently.
- Scaling efficiency: Only scale services that need scaling, saving resources and money.
- Different tech stacks: You love .NET, but your buddy prefers Node.js? Microservices let you use both.
The Good, the Bad, and the Ugly: Benefits & Challenges
Benefits:
- Flexibility in technology choices.
- Easier debugging and maintenance.
- Better scalability and performance.
- Faster development and deployment cycles.
Challenges:
- Complexity in managing multiple services.
- Increased operational overhead.
- Tougher to ensure consistency and data integrity.
- Additional tooling required (Docker, Kubernetes, etc.).
2. Implementing Microservices with ASP.NET Core: Let’s Code!
Clean Code Template (Basic Structure)
Here’s your basic, super-clean ASP.NET Core microservice layout:
MyMicroservice
├── Controllers
│   └── ProductController.cs
├── Services
│   └── ProductService.cs
├── Repositories
│   └── ProductRepository.cs
├── Models
│   └── Product.cs
├── appsettings.json
├── Program.cs
└── Startup.cs
Example: A Super Simple ASP.NET Core API Microservice
Step 1: Define Your Model
public class Product
{
    public int Id { get; set; }
    public string Name { get; set; }
    public decimal Price { get; set; }
}
Step 2: Create a Repository (Clean architecture)
public interface IProductRepository
{
    IEnumerable<Product> GetAll();
}

public class ProductRepository : IProductRepository
{
    public IEnumerable<Product> GetAll()
    {
        // Return dummy data
        return new List<Product>
        {
            new Product { Id = 1, Name = "Keyboard", Price = 29.99M },
            new Product { Id = 2, Name = "Mouse", Price = 19.99M }
        };
    }
}
Step 3: Create a Service Layer
public interface IProductService
{
    IEnumerable<Product> GetProducts();
}

public class ProductService : IProductService
{
    private readonly IProductRepository _repo;

    public ProductService(IProductRepository repo)
    {
        _repo = repo;
    }

    public IEnumerable<Product> GetProducts()
    {
        return _repo.GetAll();
    }
}
Step 4: Build the API Controller
[ApiController]
[Route("[controller]")]
public class ProductController : ControllerBase
{
    private readonly IProductService _service;

    public ProductController(IProductService service)
    {
        _service = service;
    }

    [HttpGet]
    public IActionResult Get()
    {
        return Ok(_service.GetProducts());
    }
}
This is clean, simple, and screams “microservices!“
3. Communication Between Microservices: Can You Hear Me Now?
Microservices don’t work alone—they chat like teenagers on social media. But how exactly do these tiny, independent services talk without causing chaos?
3.1 Types of Communication in Microservices
First, understand there are two primary ways microservices communicate:
-
Synchronous Communication: Think phone calls. When service A needs an instant answer from service B, it waits until service B responds.
-
Asynchronous Communication: Think texting. Service A sends a message and goes on with its life, expecting a reply later, if at all.
3.2 REST APIs (HTTP) – The Good Old Reliable
RESTful APIs are like the Swiss Army knives of microservices. They’re universal, easy to debug, and perfect for synchronous calls.
Example (ASP.NET Core):
var client = new HttpClient();
var response = await client.GetAsync("http://inventory-service/products/123");
Pros:
- Easy to implement and test
- Standardized (JSON, XML)
- Human-readable
Cons:
- Coupled services (one fails, others slow down)
- Increased latency (network overhead)
3.3 Message Queues – Async Messaging Magic!
Message Queues (RabbitMQ, Azure Service Bus) help services communicate asynchronously, reducing tight coupling.
Example (C# using RabbitMQ):
var factory = new ConnectionFactory { HostName = "localhost" };
using var connection = factory.CreateConnection();
using var channel = connection.CreateModel();

channel.QueueDeclare("order_created_queue", durable: true, exclusive: false, autoDelete: false);

var message = "Order Created with ID 123";
var body = Encoding.UTF8.GetBytes(message);

channel.BasicPublish("", "order_created_queue", null, body);
Pros:
- Decoupling (services don’t rely on immediate responses)
- Better resilience (one service down doesn’t halt the entire flow)
Cons:
- Complexity in handling message ordering and duplication
- Debugging asynchronous operations can get tricky
3.4 gRPC – Fast, Efficient, Binary Communication
Think REST APIs on steroids—gRPC uses HTTP/2 and Protocol Buffers for super-efficient communication.
Example (ASP.NET Core gRPC):
- Contract (Protobuf):
service ProductService {
  rpc GetProduct(ProductRequest) returns (ProductResponse);
}

message ProductRequest { int32 id = 1; }
message ProductResponse { string name = 1; float price = 2; }
Pros:
- Fast and efficient binary data transfer
- Strongly typed, reduces runtime errors
Cons:
- Learning curve with Protobuf and tooling
- Less readable compared to JSON/REST
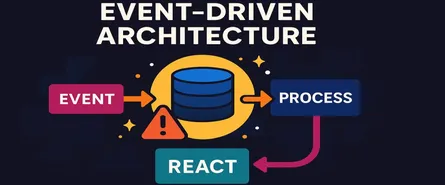
3.5 Event-Driven Architecture – Pub/Sub to the Rescue!
Event-driven microservices rely on publishing events and subscribing to them, often via Kafka, Azure Event Grid, or Event Hubs.
Pros:
- Highly scalable, loosely coupled services
- Easily extendable without impacting existing services
Cons:
- Complex architecture and debugging
- Eventual consistency can confuse beginners
4. Data Management and Storage Patterns: Data, But Distributed
Data management gets tricky with microservices. Each microservice usually has its own database—like separate lockers instead of one big storage room.
4.1 Database per Service – Freedom and Responsibility
Every microservice owns its data, choosing databases according to specific needs:
- Product Service: SQL Server
- Analytics Service: MongoDB
- Logs Service: Elasticsearch
Benefits:
- Complete autonomy, easy scaling.
- Less interference between teams.
Challenges:
- Data duplication and synchronization headaches.
- Transactions across services become complicated.
4.2 Shared Database – Why it’s an Anti-pattern!
Sharing a database feels easy but quickly becomes painful. Any schema change affects all services using it—taking you right back to monolithic chaos.
Tip: Avoid it like expired milk in your coffee.
4.3 Saga Pattern – Handling Transactions in a Distributed World
When you have a transaction spanning multiple microservices, the Saga pattern breaks it into smaller transactions.
Example:
- Order service initiates order → Inventory service updates stock → Payment service processes payment.
If something fails (e.g., payment fails), compensating actions (like restoring inventory) are triggered.
4.4 CQRS and Event Sourcing – Advanced Patterns
-
CQRS (Command Query Responsibility Segregation): Split read/write operations to optimize performance and flexibility.
-
Event Sourcing: Store events instead of just current data state. Great for auditability and debugging.
5. Containerization with Docker: Pack it, Ship it, Run it Everywhere!
Docker isn’t just trendy—it’s essential for microservices.
5.1 Why Docker?
Docker packages your application with everything it needs—code, runtime, libraries—so it works reliably everywhere.
5.2 Dockerfile for ASP.NET Core Microservices
FROM mcr.microsoft.com/dotnet/sdk:8.0 AS build
WORKDIR /app

COPY *.csproj ./
RUN dotnet restore

COPY . ./
RUN dotnet publish -c Release -o out

FROM mcr.microsoft.com/dotnet/aspnet:8.0 AS runtime
WORKDIR /app
COPY --from=build /app/out ./
ENTRYPOINT ["dotnet", "MyMicroservice.dll"]
5.3 Docker Compose for Multiple Microservices
Easily manage multiple microservices locally:
version: "3.8"
services:
  orderservice:
    build: ./OrderService
    ports:
      - "5001:80"
  inventoryservice:
    build: ./InventoryService
    ports:
      - "5002:80"
6. API Gateway and Service Discovery: Navigating the Microservices Maze
Microservices might be great, but navigating between them without getting lost can become a headache. That’s why you need an API Gateway and Service Discovery—the GPS for your microservices.
6.1 What Exactly is an API Gateway?
Imagine you’re staying at a fancy hotel. You don’t wander the halls looking for amenities. Instead, you call the front desk, and they route your request directly to the right department. That’s exactly how an API Gateway works. It acts as a single entry point that handles all requests and routes them appropriately to microservices behind the scenes.
6.2 Why Do You Need an API Gateway?
- Simplified Clients: Clients see a single entry point—no need to remember multiple endpoints.
- Cross-Cutting Concerns: Authentication, authorization, rate-limiting, caching, and logging can be centralized.
- Load Balancing: Ensures requests are distributed evenly across services.
- Protocol Translation: Converts requests between different protocols (REST to gRPC, for instance).
6.3 Popular API Gateway Options in .NET Ecosystem
- Ocelot: Lightweight and .NET-native API Gateway with excellent integration with ASP.NET Core.
- Azure API Management (APIM): Powerful cloud-managed gateway with built-in security and analytics.
- Kong Gateway: Highly scalable, open-source gateway suited for enterprise applications.
6.4 Implementing API Gateway Using Ocelot (with C# Example):
Step-by-step setup with ASP.NET Core:
Install NuGet Package:
Install-Package OcelotConfigure ocelot.json:
{
  "Routes": [
    {
      "DownstreamPathTemplate": "/api/products/{everything}",
      "DownstreamScheme": "http",
      "DownstreamHostAndPorts": [
        {
          "Host": "localhost",
          "Port": 5001
        }
      ],
      "UpstreamPathTemplate": "/products/{everything}",
      "UpstreamHttpMethod": ["GET", "POST"]
    }
  ]
}
Update Program.cs:
var builder = WebApplication.CreateBuilder(args);
builder.Configuration.AddJsonFile("ocelot.json");
builder.Services.AddOcelot();

var app = builder.Build();
app.UseOcelot().Wait();
app.Run();
With this simple setup, you’ve got a fully functioning API gateway!
6.5 Service Discovery: Why Your Services Need to Find Each Other?
Microservices constantly come and go. IP addresses change. Hardcoding endpoints is like using paper maps in the GPS era—inefficient and error-prone. Service discovery is the GPS of your microservices.
6.6 Types of Service Discovery
- Client-side Discovery: Clients retrieve available service instances from a service registry and select the best one.
- Server-side Discovery: Clients make requests through a load balancer that handles discovery transparently.
6.7 Popular Service Discovery Tools:
- Consul: Robust, highly configurable, supports health checks and load balancing.
- Eureka: Widely used, integrates seamlessly with .NET via Steeltoe framework.
- Azure Service Fabric: Provides automatic service discovery, ideal if you’re in the Azure ecosystem.
6.8 Implementing Service Discovery Using Consul (ASP.NET Core Example):
1. Register a service:
services.AddConsulConfig(Configuration);2. Consul Configuration Helper:
public static class ConsulExtensions
{
    public static IServiceCollection AddConsulConfig(this IServiceCollection services, IConfiguration config)
    {
        services.AddSingleton<IConsulClient, ConsulClient>(p => new ConsulClient(cfg =>
        {
            var address = config["ConsulConfig:Address"];
            cfg.Address = new Uri(address);
        }));
        return services;
    }
}
With Consul, your microservices always know how to reach each other dynamically.
7. Logging, Monitoring, and Observability: See Everything Clearly
Operating microservices without clear observability is like driving with a blindfold—you’ll crash eventually. You need visibility into what’s happening across the board.
7.1 Why Observability Matters?
- Quickly diagnose and fix problems.
- Understand system behavior, performance, and trends.
- Prevent failures before they occur (proactive troubleshooting).
7.2 Logging Strategies: Structured Logging is a Must
Instead of dumping messy text logs, use structured logging:
- Serilog: .NET logging library offering structured logs.
- Seq: Centralized, searchable log server for visual exploration.
Example using Serilog in .NET:
Log.Logger = new LoggerConfiguration()
    .WriteTo.Console()
    .WriteTo.Seq("http://localhost:5341")
    .CreateLogger();

Log.Information("Order placed successfully with Id {OrderId}", orderId);
7.3 Monitoring and Metrics: Don’t Guess, Measure!
Use tools to measure application performance:
- Prometheus & Grafana: Powerful combination for collecting and visualizing metrics.
- Azure Application Insights: Easy, integrated solution for Azure environments.
7.4 Distributed Tracing: Following Requests Across Services
Tracing gives you detailed insights into individual request flows across multiple services.
- Jaeger: Popular distributed tracing tool.
- OpenTelemetry: Open standard supported by .NET.
Implementing OpenTelemetry in .NET:
builder.Services.AddOpenTelemetryTracing(b =>
{
    b.AddAspNetCoreInstrumentation();
    b.AddHttpClientInstrumentation();
    b.AddJaegerExporter(opts => {
        opts.AgentHost = "localhost";
        opts.AgentPort = 6831;
    });
});
8. Security in Microservices: Because Locks Matter!
Microservices create more endpoints—more doors, more risk. It’s crucial you secure every single service.
8.1 Authentication & Authorization (OAuth 2.0 and JWT)
- Use JWT tokens to secure inter-service communications.
- Implement OAuth 2.0 flows using IdentityServer4 or Azure AD B2C.
8.2 Example: Secure a Microservice API with JWT (.NET)
builder.Services.AddAuthentication(JwtBearerDefaults.AuthenticationScheme)
.AddJwtBearer(options =>
{
    options.Authority = "https://identityserver-url";
    options.Audience = "microservice-api";
});
Then protect endpoints:
[Authorize]
[HttpGet("products")]
public IActionResult GetProducts() { ... }
8.3 HTTPS & Transport Layer Security (TLS)
Always encrypt service-to-service communication:
- Configure HTTPS endpoints for each service.
- Avoid self-signed certificates in production (use trusted Certificate Authorities).
8.4 API Gateway Security Features
Leverage the API gateway to centralize security policies:
- Rate Limiting: Prevent denial-of-service attacks.
- IP Filtering: Block unauthorized IP addresses.
- Web Application Firewall (WAF): Protect against common web threats.
8.5 Secrets Management: Protect Sensitive Data!
Never hard-code passwords or API keys.
Use secure secrets management:
- Azure Key Vault: Centralized, secure storage for secrets.
- HashiCorp Vault: Open-source tool for secrets and encryption management.
8.6 Security Testing & Auditing
Perform regular:
- Penetration testing: Simulate real attacks to uncover vulnerabilities.
- Static code analysis: Detect security flaws early (SonarQube, OWASP ZAP).
8.7 Principle of Least Privilege
Always grant services only the permissions needed to do their jobs. Limit scope and reduce risk.
9. CI/CD and DevOps: Accelerate, Automate, and Scale Your Microservices Like a Pro!
Imagine this: you’ve spent days perfecting your code, everything works locally, and now you need to push it to production. But wait—how do you make sure your changes won’t break everything? How do you rapidly deploy features without stress or downtime? Enter Continuous Integration (CI), Continuous Delivery and Deployment (CD), and DevOps—the superheroes of modern software development!
If microservices are individual musicians in an orchestra, then DevOps and CI/CD are the conductors making sure everyone plays together perfectly. Let’s dive deep and see how you can implement world-class CI/CD practices, especially in the Microsoft and .NET ecosystem.
9.1 Understanding CI/CD: More Than Just Buzzwords
First things first: what’s all this fuss about?
- Continuous Integration (CI) ensures your code merges seamlessly and frequently.
- Continuous Delivery (CD) makes sure your application is always ready to deploy at any moment.
- Continuous Deployment (also CD) takes it a step further—automatically deploying changes to production without manual intervention.
Think of CI/CD like a conveyor belt in a factory: once the assembly starts (CI), the product moves smoothly through inspection (tests) and packaging (CD), finally arriving at the customers (deployment) without delays.
9.2 Why Microservices Absolutely Need CI/CD
Microservices mean more deployments—more independent releases and increased complexity. Manual deployments for multiple services would quickly become chaotic. CI/CD brings structure, automation, and confidence to your releases.
Benefits of CI/CD in Microservices:
- Rapid Deployment: Features and bug fixes go live faster.
- Reduced Risk: Frequent testing catches issues early.
- Improved Quality: Automation reduces human errors.
- Better Productivity: Less manual overhead frees your team to innovate.
9.3 CI/CD Workflow in Microservices: The Big Picture
Let’s break down the steps clearly:
- Commit & Push – Developers commit code regularly.
- Automated Builds – Each commit triggers an automated build.
- Unit & Integration Tests – Code quality checks are executed automatically.
- Dockerization – Successful builds are packaged into Docker containers.
- Deployment to Test Environments – Automatic deployments to test or staging.
- Acceptance Tests – Automatically run UI and integration tests.
- Deployment to Production – Once everything passes, deploy to production (automatically or with a single-click approval).
- Monitoring & Feedback – Observability ensures everything works as expected.
9.4 Setting Up CI/CD for Microservices Using Azure DevOps
Azure DevOps provides excellent tools for building end-to-end CI/CD pipelines.
Step-by-Step Guide to a Basic CI/CD Pipeline:
Step 1: Create a Pipeline
- Go to Azure DevOps → Pipelines → New Pipeline
- Connect your Git repository (GitHub, Azure Repos)
Step 2: Define Build Pipeline (azure-pipelines.yml):
Here’s a clear example for an ASP.NET Core Microservice:
trigger:
- main

pool:
  vmImage: 'ubuntu-latest'

variables:
  buildConfiguration: 'Release'

steps:
- task: DotNetCoreCLI@2
  displayName: 'Restore NuGet packages'
  inputs:
    command: 'restore'
    projects: '**/*.csproj'

- task: DotNetCoreCLI@2
  displayName: 'Build the Project'
  inputs:
    command: 'build'
    arguments: '--configuration $(buildConfiguration)'

- task: DotNetCoreCLI@2
  displayName: 'Run Unit Tests'
  inputs:
    command: 'test'
    arguments: '--configuration $(buildConfiguration) --no-build'

- task: DotNetCoreCLI@2
  displayName: 'Publish App'
  inputs:
    command: 'publish'
    arguments: '--configuration $(buildConfiguration) --output publish_output'

- task: Docker@2
  displayName: 'Build and Push Docker Image'
  inputs:
    command: buildAndPush
    repository: 'myacr.azurecr.io/microservice-api'
    dockerfile: '**/Dockerfile'
    containerRegistry: 'ACR-Service-Connection'
    tags: |
      $(Build.BuildId)
Step 3: Create a Release Pipeline
Automatically deploy to Azure Kubernetes Service (AKS) or Azure App Service.
Example:
- Add tasks for deploying the Docker container to your cloud infrastructure.
- Include approvals or gates for manual verification before production releases.
9.5 Advanced DevOps Practices for Microservices
With basics covered, let’s level up your DevOps game.
Infrastructure as Code (IaC):
Manually configuring environments leads to errors. Use IaC to provision environments automatically:
- Terraform: Multi-cloud infrastructure definition tool.
- Azure ARM Templates or Bicep: Native Azure tools for provisioning.
- Pulumi: Modern, developer-friendly infrastructure as code.
Example using Terraform for Azure:
resource "azurerm_resource_group" "rg" {
  name     = "microservice-rg"
  location = "West Europe"
}

resource "azurerm_app_service_plan" "plan" {
  name                = "microservice-plan"
  location            = azurerm_resource_group.rg.location
  resource_group_name = azurerm_resource_group.rg.name
  sku {
    tier = "Standard"
    size = "S1"
  }
}
Automated Testing Strategies:
- Unit Tests: Immediate feedback on individual components.
- Integration Tests: Test interactions between microservices.
- End-to-End (E2E) Tests: Simulate user workflows.
Tools: xUnit, NUnit, Selenium, Postman (Newman CLI).
Blue/Green and Canary Deployments:
- Blue/Green Deployments: Have two identical environments (“Blue” is active, “Green” inactive). Deploy updates to the inactive environment, then switch traffic instantly.
- Canary Releases: Slowly roll out new releases to a small percentage of users, checking for issues before wide release.
9.6 Observability and Monitoring in DevOps
CI/CD doesn’t end at deployment. Monitoring and observability help ensure your app is healthy.
- Use dashboards (Grafana, Azure Monitor) to visualize application health.
- Set up alerts for automated incident response.
9.7 Security and Compliance in CI/CD Pipelines
Security needs to be part of your automated pipeline.
- Static Application Security Testing (SAST): Scan code for security flaws automatically (SonarQube, OWASP Dependency Check).
- Dynamic Application Security Testing (DAST): Security testing on running apps.
- Secrets Management: Integrate Azure Key Vault or HashiCorp Vault for managing secrets securely.
9.8 Culture of DevOps: Collaboration & Ownership
DevOps isn’t just tools—it’s a cultural shift. Foster collaboration, communication, and shared responsibility:
- Regular retrospectives to continuously improve your pipeline.
- Encourage developers to own deployment processes.
- Use ChatOps (integrating deployments with Slack or Teams) for transparency.
9.9 Choosing the Right CI/CD Tools in the Microsoft Ecosystem
- Azure DevOps: Best for teams deeply integrated into Azure.
- GitHub Actions: Simple setup, great for open-source or hybrid cloud environments.
- Jenkins: Flexible, open-source, highly customizable.
Each tool has strengths—pick based on your team’s size, needs, and infrastructure.
Conclusion: Wrapping Up Microservices
Microservices aren’t a magical silver bullet—but they come pretty close when you need agility, flexibility, and scalability. With ASP.NET Core, Docker, effective communication patterns, solid security practices, and efficient CI/CD pipelines, you’re equipped to build robust, maintainable microservices that scale smoothly.
Now go ahead, break that monolith, and start building your neatly compartmentalized software lunchbox! Your future self—and your team—will thank you.
Happy architecting!
Tags
Share this article
Help others discover this content
About Sudhir mangla
Content creator and writer passionate about sharing knowledge and insights.
View all articles by Sudhir mangla →