1 The Inevitable Shift: Why Compliance Can’t Be an Afterthought
1.1 Introduction: The Modern .NET Team’s Dilemma
Imagine this: a .NET development team has just finished a sprint. They’ve built a set of new APIs, added a serverless background process, and provisioned an Azure Storage Account to hold temporary files. Quality assurance signs off, stakeholders are waiting, and production release is just around the corner.
Then the last hurdle appears — a compliance check. The security team runs their audit and flags several issues:
- A storage container that isn’t encrypted.
- A network rule that allows overly broad access.
- Missing diagnostic logs on a critical API that will handle personal data.
Suddenly, the release is blocked. Developers spend late nights fixing issues. Emergency change approvals are filed. Evidence is cobbled together from console screenshots and Excel sheets. What should have been a smooth release turns into a stressful firefight.
This situation happens often because compliance is usually treated as an afterthought — a box to tick at the end of delivery. When handled this way, compliance slows down releases, frustrates teams, and introduces unnecessary risks.
Compliance-as-Code (CaC) turns this process on its head. Instead of leaving compliance until the last minute, it integrates it directly into the development lifecycle. With CaC, policies are written as code, validated automatically in pipelines, and enforced in deployments. Developers get instant feedback, security teams see consistent enforcement, and releases continue without painful last-minute surprises.
In this guide, we’ll walk through how to make CaC practical for .NET teams on Azure. Using tools like Bicep, Azure Policy, Microsoft Defender for Cloud, and GitHub Actions, we’ll show how to turn compliance from a blocker into a built-in part of your delivery pipeline. Expect clear examples, a ready-to-use control matrix, and real-world advice on handling trade-offs and exceptions.
1.2 The Cost of Traditional Compliance
Before Compliance-as-Code, most organizations handled compliance with spreadsheets, meetings, and checklists. On paper, this seems workable. In practice, it breaks down quickly in modern, cloud-based environments.
Here’s why:
- Error prone – People forget steps, overlook resources, or miss transient cloud changes. A VM spun up for testing might bypass encryption requirements and slip through unnoticed.
- Late discovery – Issues are usually found right before release. Fixing them at that stage is disruptive, requiring rushed changes, rework, or even rollback.
- Inconsistent enforcement – Different teams may apply different rules. Some may enforce strict tagging, others may skip it. Policies drift across environments, leading to gaps.
- Weak audit evidence – When an auditor asks for proof, evidence is often scattered across screenshots, logs, and emails. Producing it becomes slow, frustrating, and expensive.
The risks are real and costly. Under GDPR, fines can reach up to €20 million or 4% of global annual revenue. CCPA allows consumers to sue businesses directly after a breach, with damages that scale quickly across large data sets. PCI DSS violations can result in loss of payment processing privileges, and HIPAA breaches can trigger strict corrective action plans and heavy penalties.
And let’s not forget reputation. A public compliance failure doesn’t just cost money — it damages trust with customers, partners, and regulators. Traditional, manual compliance is simply too fragile to keep pace with modern software delivery.
1.3 What is Compliance-as-Code? The Core Principles
Compliance-as-Code is the practice of managing compliance in the same way we manage application code or infrastructure — by defining it in files, version-controlling it, testing it, and automating its enforcement.
Instead of relying on people to remember compliance steps, we let the cloud platform enforce rules for us. For example, if a rule says “all storage accounts must enforce encryption,” the policy is codified and deployed. From then on, Azure blocks or flags any resource that violates it.
The core principles of CaC are:
-
Declarative You state what must be true, not how to get there. For instance:
- Declarative rule: “Storage accounts must enforce HTTPS traffic only.”
- Non-declarative/manual: “Remember to click through the Azure Portal and toggle the HTTPS setting.” Declarative rules are simple, repeatable, and enforceable.
-
Version Controlled All compliance definitions (policies, initiatives, exemptions) live in Git. Every change has a clear history of who made it, when, and why. This means compliance controls benefit from the same review process as application code — pull requests, approvals, and automated tests.
-
Automated Policies aren’t checked manually. Instead, pipelines validate them before deployment. Azure Policy enforces them at deployment. Defender for Cloud monitors them continuously after deployment. This automation closes the gap between “policy on paper” and “policy in practice.”
-
Collaborative Compliance is no longer hidden away with security or legal teams. Developers, architects, and compliance officers work together in the same repo. Discussions happen on pull requests, where everyone can see the rationale, implementation, and evidence.
The Benefits in Practice
When you embrace CaC:
- Releases move faster because compliance is part of the normal pipeline, not a last-minute blocker.
- Policies are applied consistently across subscriptions and environments.
- Audit readiness improves because evidence is always current and easy to query.
- Risk decreases because issues are prevented before they reach production.
In short, CaC makes compliance less about fear and friction, and more about confidence and speed.
2 Deconstructing the Regulations: From Legalese to Technical Controls
Legal and regulatory texts are written for lawyers and regulators, not developers. They describe obligations (“personal data must be protected”) but rarely tell you how to implement them in a cloud environment. As a senior developer, architect, or tech lead, your challenge is to translate those obligations into clear, testable, technical controls.
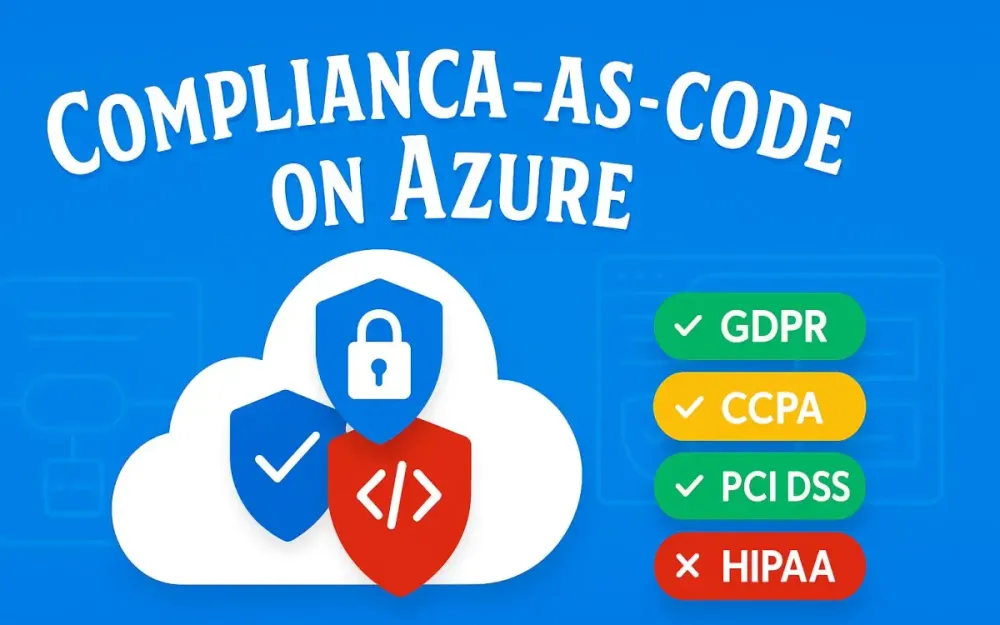
This section breaks down four major frameworks that many teams encounter—GDPR, CCPA, PCI DSS, and HIPAA—and shows how to interpret their requirements in practical terms. We’ll then introduce a “control matrix” that helps you connect the dots between legal rules, Azure implementation, and policy enforcement.
2.1 A Pragmatist’s Guide to Key Regulations
⚠️ Important reminder: This isn’t legal advice. The goal here is to help technical teams extract actionable engineering steps. Always consult your legal or compliance department for final interpretations.
2.1.1 GDPR (General Data Protection Regulation)
Purpose: Protect the personal data of EU residents. It applies to any organization that collects, processes, or stores that data.
What it really means for engineers:
- Know where the data lives – You must track the location of data and avoid unnecessary transfers outside approved regions.
- Encrypt and protect – Data must be encrypted both at rest and in transit. Pseudonymization or tokenization is recommended when full identifiers aren’t needed.
- Control access – Only the right people should access sensitive data. Use least privilege, enforce MFA for admins, and keep detailed logs of access attempts.
Azure implementation ideas:
- Enable Storage Service Encryption (SSE) with either platform-managed or customer-managed keys.
- Force TLS (HTTPS) connections for all storage and web apps.
- Use Azure RBAC and Conditional Access for admin accounts.
- Enable centralized logging with Azure Monitor and Log Analytics to track who accessed what, and when.
2.1.2 CCPA (California Consumer Privacy Act)
Purpose: Give California residents more control over their personal information, including the right to know, delete, or opt-out of data sales. It also requires businesses to take “reasonable security” measures.
What it really means for engineers:
- Find and classify data – You must be able to identify and tag customer data so it can be located quickly.
- Support secure deletion – If a customer asks for deletion, you need a reliable and auditable way to wipe their records.
- Use strong protection – Encryption, access control, and breach detection aren’t optional—they’re the baseline of “reasonable security.”
Azure implementation ideas:
- Apply tags and labels to resources that hold consumer data, using Azure Resource Graph for quick queries.
- Use soft delete and purge protection features in Storage Accounts, SQL, or Key Vault for controlled retention and deletion.
- Implement RBAC, key vault for secret management, and Defender for Cloud alerts for breach detection.
2.1.3 PCI DSS (Payment Card Industry Data Security Standard)
Purpose: Protect cardholder data in organizations that process, store, or transmit it. Unlike GDPR/CCPA, PCI DSS is a detailed technical standard with explicit requirements.
What it really means for engineers:
- Segment and control networks – Keep cardholder data environments (CDEs) isolated. Only allow essential inbound/outbound traffic.
- Strong authentication – Enforce multi-factor authentication and least-privilege access for anyone touching payment data.
- Logging and encryption – All activity must be logged, and cardholder data must be encrypted wherever it resides.
Azure implementation ideas:
- Use Network Security Groups (NSGs) and Azure Firewall to restrict traffic.
- Implement tokenization or Azure Key Vault for storing sensitive keys.
- Enable diagnostic logging for payment-related resources, stream logs to a SIEM, and run regular vulnerability scans (Defender for Cloud can help here).
2.1.4 HIPAA (Health Insurance Portability and Accountability Act)
Purpose: Protect sensitive health data (PHI) in the U.S. This applies to healthcare providers, insurers, and their business partners.
What it really means for engineers:
- Audit and monitor – Systems that handle PHI must log access and changes so they can be reviewed later.
- Encrypt and maintain integrity – PHI must be encrypted both in transit and at rest, and integrity checks should ensure it isn’t tampered with.
- Administrative safeguards – Document risk assessments, enforce role-based access, and sign Business Associate Agreements (BAAs) with cloud providers.
Azure implementation ideas:
- Enable diagnostic settings on all PHI-related resources, sending logs to Log Analytics or Event Hub.
- Enforce encryption for databases, storage accounts, and communications.
- Use Azure Active Directory RBAC and Privileged Identity Management (PIM) to restrict and audit admin access.
- Ensure you have a signed BAA with Microsoft if processing PHI in Azure.
2.2 The Rosetta Stone: Building Your Control Matrix
Now comes the practical part: how do you connect these high-level rules with day-to-day engineering work? That’s where a control matrix comes in.
A control matrix acts like a translation dictionary:
- Legal teams say: “Encrypt all personal data.”
- Security teams translate that to: “We’ll enforce encryption at rest with customer-managed keys.”
- Developers see: “If I try to deploy a Storage Account without encryption, my pipeline will fail.”
- Auditors get: “Here’s the Azure Policy assignment and log evidence that encryption is enforced everywhere.”
This matrix keeps everyone aligned.
How to structure it
Each row should represent a single, testable control. Columns should include:
- Regulation reference (so auditors can trace it back).
- A plain-English description (so non-technical folks understand it).
- The Azure technical mapping (so developers know what to build).
- The Policy/Initiative ID (so it’s directly tied to enforcement).
Example Control Matrix
| Control ID | Regulation Source | Control Description (Plain English) | Azure Implementation | Policy Definition ID |
|---|---|---|---|---|
PCI-1.2.1 | PCI DSS Req. 1.2.1 | Restrict inbound/outbound traffic to only what is necessary. | Use NSGs to limit open ports on VMs and App Services; enforce outbound rules via Azure Firewall. | Deny inbound traffic from 'Any' source on ports 22, 3389 |
GDPR-32.1.a | GDPR Art. 32(1)(a) | Encrypt personal data at rest and in transit. | Force HTTPS for all App Services; enable Storage Service Encryption with CMK or platform-managed keys. | App Service apps should only be accessible over HTTPS |
HIPAA-164.312 | HIPAA §164.312(b) | Record and monitor activity on systems handling health data (PHI). | Enable diagnostic logs and forward to Log Analytics Workspace; enforce proper log retention and access. | Azure Monitor diagnostic settings must be configured on all resources |
How to use the matrix
- Extract controls – From each regulation, pull out 2–6 technical requirements that actually apply to your workloads.
- Map to Azure – For each, find the Azure setting or service that enforces the requirement (e.g., HTTPS-only, encryption enabled).
- Tie to policy – Link the control to a built-in or custom Azure Policy definition/initiative ID.
- Store it in Git – Save the matrix as a markdown table in your repo (
/compliance/control-matrix.md) and keep it updated.
Trade-offs to consider
- Strictness vs. productivity: Use
Denyfor must-have controls (like encryption), but considerAuditfirst during adoption to reduce developer friction. - Auto-remediation vs. safety:
DeployIfNotExistscan fix issues automatically, but if misconfigured, it can surprise teams. Start with low-risk scenarios. - Scope & inheritance: Assign policies at the management group level for consistency, but use subscriptions or resource groups when piloting or handling exceptions.
Practical tips for your first sprint
- Start small with 4–6 high-impact controls: encryption, HTTPS-only, diagnostic logging, and NSG restrictions.
- Prefer built-in policies first — they integrate cleanly with Defender for Cloud. Add custom definitions only where necessary.
- Keep policies, initiatives, and assignments in version control alongside your IaC. Use PR reviews and CI checks to manage changes.
Key Takeaways
- Regulations can be boiled down into measurable, technical requirements.
- A control matrix is your “translation layer” — it ensures legal, security, development, and audit teams all see the same rule in their own language.
- Azure Policy, Bicep, and Defender for Cloud provide the enforcement and monitoring layer that makes these controls real.
3 The Azure Governance Toolkit: Your CaC Building Blocks
Having translated regulations into actionable controls, the next step is choosing the right Azure-native tools to enforce and automate them. Compliance-as-Code succeeds only if your platform can continuously check, enforce, and remediate rules without relying on manual oversight. Azure provides a powerful governance toolkit that works hand-in-hand with your .NET workloads. In this section, we’ll examine four essential components: Azure Policy, Bicep, Microsoft Defender for Cloud, and GitHub Actions. Together, they form the foundation for a scalable, developer-friendly compliance framework.
3.1 Azure Policy: The Rule Engine for Your Cloud
Azure Policy is the backbone of compliance enforcement in Azure. It ensures that resources adhere to specific requirements at the time they are created or updated, and it can assess existing resources for drift. Policies act as guardrails, catching misconfigurations before they cause compliance failures.
The key concepts in Azure Policy are:
-
Policy Definitions: These are the smallest units of compliance. A definition specifies a condition (e.g., “Storage accounts must only accept HTTPS traffic”) and an effect (e.g., deny, audit, modify). Definitions can be built-in or custom.
-
Initiatives (Policy Sets): These group multiple policy definitions into a logical bundle. For example, a “PCI DSS Initiative” might contain 20 policies covering encryption, logging, and networking. Initiatives simplify assignment and reporting.
-
Assignments: Policies or initiatives don’t do anything until they’re assigned to a scope (management group, subscription, or resource group). Assignments let you parameterize policies (e.g., specify an allowed region).
-
Effects: The action Azure takes when a resource violates a policy. Common effects include:
Deny: Prevents resource creation or update.Audit: Marks non-compliant resources but doesn’t block them.DeployIfNotExists: Automatically adds missing configuration (e.g., enable diagnostic settings).Modify: Alters a resource during deployment to make it compliant.
Example – Built-in Policy Definition (JSON snippet):
{
  "properties": {
    "displayName": "Storage accounts should allow only HTTPS traffic",
    "policyType": "BuiltIn",
    "mode": "Indexed",
    "parameters": {},
    "policyRule": {
      "if": {
        "field": "Microsoft.Storage/storageAccounts/supportsHttpsTrafficOnly",
        "equals": "false"
      },
      "then": {
        "effect": "Deny"
      }
    }
  }
}
When assigned, this policy blocks any attempt to create or update a storage account without HTTPS enforced. Developers receive immediate feedback that their resource definition violates compliance.
The combination of Audit and Deny is especially powerful in a phased rollout. For new projects, you might start with Audit to measure compliance levels, then flip to Deny once teams are accustomed to the guardrails.
3.2 Azure Bicep: Describing Your Policies as Code
While Azure Policy defines what must happen, Bicep provides the infrastructure-as-code framework to declare, parameterize, and deploy those policies consistently. Bicep is a domain-specific language (DSL) that simplifies authoring Azure Resource Manager (ARM) templates. Compared to raw ARM JSON, Bicep is more concise, type-safe, and modular.
Why Bicep for Compliance-as-Code?
- Clarity: Bicep syntax is easier to read and write than verbose ARM JSON.
- Modularity: Policies, initiatives, and assignments can be packaged into reusable modules.
- Integration: Bicep works seamlessly with Azure CLI and GitHub Actions, making it perfect for CI/CD.
Example – Assigning a Policy via Bicep:
param policyAssignmentName string = 'enforce-https-storage'
param policyDefinitionId string = '/providers/Microsoft.Authorization/policyDefinitions/3e382e5e-65e1-4e7e-8a2b-d8f26f14b18d' // built-in HTTPS only policy

resource policyAssignment 'Microsoft.Authorization/policyAssignments@2022-06-01' = {
  name: policyAssignmentName
  properties: {
    displayName: 'Enforce HTTPS for Storage Accounts'
    policyDefinitionId: policyDefinitionId
    scope: subscription().id
    enforcementMode: 'Default'
  }
}
Instead of clicking through the portal, you now have a repeatable, version-controlled artifact. Developers can open a pull request to add or update this file, and the pipeline will validate it automatically.
Compared to ARM:
- ARM requires hundreds of lines of JSON to achieve the same result.
- Bicep automatically validates parameters and resource types, catching errors early.
- Refactoring is easier, as modules can be reused across initiatives and environments.
3.3 Microsoft Defender for Cloud: The Compliance Command Center
Azure Policy enforces rules, but how do you see whether your environment complies with a regulation overall? That’s where Microsoft Defender for Cloud steps in.
Defender for Cloud provides:
- A unified security posture dashboard: See the compliance score of subscriptions and workloads.
- The Regulatory Compliance Dashboard: Automatically maps Azure’s built-in policies to frameworks like PCI DSS, ISO 27001, NIST, and Azure CIS benchmarks. This means you can immediately measure against industry standards.
- Drift detection: If someone makes a manual change in the portal that violates a policy, Defender flags it.
- Integration with Azure Policy: Your custom initiatives show up alongside Microsoft’s built-in mappings, giving auditors a single pane of glass.
Example – Regulatory Compliance Dashboard: Imagine you assign a PCI DSS initiative at the management group level. Within hours, Defender for Cloud shows a new tab called “PCI DSS Initiative.” It lists controls such as encryption, logging, and network restrictions, showing which are compliant, which are not, and remediation steps.
You can drill down to see exactly which Storage Accounts are non-compliant and export the data for an auditor. This turns weeks of audit preparation into a few clicks.
3.4 GitHub Actions: The Automation and Enforcement Layer
Policies and initiatives are only useful if they’re deployed consistently and validated before they reach production. GitHub Actions provides the automation layer that connects everything.
With GitHub Actions you can:
- Validate Bicep files: Run
bicep buildto ensure templates compile correctly. - Lint for best practices: Use
PSRule.Rules.Azureto check for misconfigurations. - Preview deployments: Use
az deployment what-ifto show changes before applying. - Gate deployments: Block merging of pull requests if compliance checks fail.
- Deploy policies: Use Actions workflows to deploy assignments and initiatives automatically on approval.
Example – GitHub Workflow Snippet:
name: Deploy Compliance Policies
on:
  push:
    branches: [ main ]
jobs:
  deploy:
    runs-on: ubuntu-latest
    steps:
      - uses: actions/checkout@v3
      - name: Azure Login
        uses: azure/login@v1
        with:
          creds: ${{ secrets.AZURE_CREDENTIALS }}
      - name: Build Bicep
        run: az bicep build --file policies/assignments/assign-storage-https.bicep
      - name: Deploy Policy
        run: |
          az deployment sub create \
            --location eastus \
            --template-file policies/assignments/assign-storage-https.bicep
This workflow ensures that no policy is deployed manually. Every change is auditable, reproducible, and automated.
4 Phase 1: Codifying Your First Guardrail with Bicep and Azure Policy
With the toolkit in place, let’s walk through a practical example of codifying a compliance requirement end-to-end. We’ll start small with a single guardrail, then scale up to an initiative.
4.1 From Matrix to Module: A Practical Example
Goal: Enforce that all new Storage Accounts only allow HTTPS traffic. This requirement appears in multiple frameworks (GDPR, PCI DSS) and is a simple, high-impact starting point.
4.1.1 Finding the Built-in Policy
Azure already provides a built-in policy for this control. You can find it via the portal or CLI.
Azure CLI example:
az policy definition list --query "[?displayName=='Storage accounts should restrict network access'].{Name:displayName, ID:id}"This command returns the policy’s definition ID, which you’ll need when creating the assignment. Built-in policies save time because they’re maintained by Microsoft and integrate seamlessly into Defender for Cloud.
4.1.2 Creating a Bicep Policy Assignment
Here’s how to create a simple assignment with Bicep:
param policyAssignmentName string = 'storage-https-only'
param location string = 'eastus'

resource assignment 'Microsoft.Authorization/policyAssignments@2022-06-01' = {
  name: policyAssignmentName
  properties: {
    displayName: 'Enforce HTTPS on Storage Accounts'
    policyDefinitionId: '/providers/Microsoft.Authorization/policyDefinitions/3e382e5e-65e1-4e7e-8a2b-d8f26f14b18d'
    scope: subscription().id
    enforcementMode: 'Default'
    nonComplianceMessages: [
      {
        message: 'All storage accounts must enforce HTTPS only.'
      }
    ]
  }
  location: location
}
Notice the nonComplianceMessages property. This is what developers will see when their deployment is denied, providing a clear explanation of why the resource failed.
4.1.3 Deploying via AZ CLI
Once the Bicep file is in version control, you can deploy it:
az deployment sub create \
  --name assign-storage-https \
  --location eastus \
  --template-file ./policies/assignments/storage-https-assignment.bicep
From this point forward, any attempt to create a storage account without HTTPS is blocked at the platform level.
4.2 Scaling Up: Creating a Custom Initiative for PCI DSS
Assigning single policies works for one or two controls, but compliance frameworks like PCI DSS require dozens. This is where initiatives shine.
4.2.1 Defining the Initiative in Bicep
Here’s a pci-dss-initiative.bicep file that groups multiple built-in policies:
resource pciInitiative 'Microsoft.Authorization/policySetDefinitions@2022-06-01' = {
  name: 'pci-dss-core-controls'
  properties: {
    displayName: 'PCI DSS Core Initiative'
    description: 'Key PCI DSS controls: encryption, NSG, disk encryption'
    policyType: 'Custom'
    parameters: {}
    policyDefinitions: [
      {
        policyDefinitionId: '/providers/Microsoft.Authorization/policyDefinitions/3e382e5e-65e1-4e7e-8a2b-d8f26f14b18d' // HTTPS Storage
      }
      {
        policyDefinitionId: '/providers/Microsoft.Authorization/policyDefinitions/a451c1ef-c6ca-483d-87d8-9c1de7b8f7a4' // NSG restrict inbound
      }
      {
        policyDefinitionId: '/providers/Microsoft.Authorization/policyDefinitions/1a5d010d-5bb1-4c67-9e5a-7b4f0d3b7d3f' // Encrypt managed disks
      }
    ]
  }
}
This initiative bundles encryption and network policies into one compliance package.
4.2.2 Assigning the Initiative
Once defined, you assign it with another Bicep file:
param mgScope string

resource pciAssignment 'Microsoft.Authorization/policyAssignments@2022-06-01' = {
  name: 'assign-pci-dss'
  properties: {
    displayName: 'Assign PCI DSS Initiative'
    policyDefinitionId: resourceId('Microsoft.Authorization/policySetDefinitions', 'pci-dss-core-controls')
    scope: mgScope
    enforcementMode: 'Default'
  }
}
Deploying this assignment applies the PCI DSS initiative to all subscriptions under the management group scope, ensuring consistency across the enterprise.
4.3 Best Practices: Structuring Your Policy-as-Code Repository
A scalable compliance repository should mirror how you structure application code: clear directories, reusable modules, and automation baked in.
Recommended structure:
/policies
  /initiatives
    pci-dss.bicep
    gdpr.bicep
  /definitions
    custom-tags-policy.bicep
/assignments
  /production-mg
    assign-pci-dss.bicep
    assign-gdpr.bicep
.github/workflows
  deploy-policies.yml
Best practices:
- Separate definitions, initiatives, and assignments: This makes it easier to reuse policies across initiatives.
- Use modules: Turn frequently used assignments into Bicep modules. For example,
enforce-https-storage.bicepcan be reused across multiple initiatives. - Automate everything: Use GitHub Actions to validate Bicep syntax, check compliance with PSRule, and deploy automatically on PR approval.
- Document exemptions: Keep an
exemptions/folder with Bicep definitions for approved exceptions, ensuring they are tracked and reviewed.
This structure scales to hundreds of policies while remaining maintainable. Developers know where to add or update policies, security teams can review initiatives holistically, and auditors can trace assignments back to regulatory requirements.
5 Phase 2: Building the Gated CI/CD Pipeline with GitHub Actions
Once policies and initiatives are codified with Bicep and assigned using Azure Policy, the next step is to ensure they integrate seamlessly into your development workflow. A policy that only exists in Azure but is bypassed during CI/CD is a weak link. To fully embrace Compliance-as-Code, you need a gated pipeline: a set of automated steps that validate infrastructure changes before they are merged or deployed. GitHub Actions provides the perfect engine for this, offering tight integration with Azure, developer-friendly workflows, and the ability to “shift left” compliance checks.
In this phase, we’ll build two critical workflows: one that validates compliance before deployment (pre-flight checks) and another that demonstrates how policies actively block non-compliant infrastructure during deployment.
5.1 The “Shift Left” Workflow: Pre-Deployment Validation
Shifting left means catching compliance issues as early as possible — ideally before they ever reach Azure. By integrating checks directly into pull requests, developers get fast feedback, security teams get assurance, and compliance officers see a consistent process. Let’s build a GitHub Actions workflow called validate-iac.yml that runs automatically whenever someone opens or updates a pull request.
Step 1: Linting and Building with Bicep
The first check is simple but essential: ensure that Bicep templates are syntactically correct and compile into valid ARM JSON. This prevents trivial errors from slipping through.
Workflow snippet:
name: Validate IaC
on:
  pull_request:
    branches: [ main ]

jobs:
  validate:
    runs-on: ubuntu-latest
    steps:
      - uses: actions/checkout@v3

      - name: Set up Azure CLI
        uses: azure/setup-azure@v3

      - name: Validate Bicep build
        run: |
          for file in $(find ./policies -name '*.bicep'); do
            echo "Building $file..."
            az bicep build --file $file
          done
This loop compiles all Bicep files in the repository, ensuring they’re valid. If any file fails to build, the workflow fails and the PR cannot be merged.
Step 2: Pre-flight Checks with PSRule for Azure
Linting ensures syntactic correctness, but it doesn’t guarantee best practices or compliance with organizational standards. That’s where PSRule.Rules.Azure comes in. This open-source tool runs static analysis on Bicep/ARM templates, checking for common misconfigurations such as missing tags, insecure defaults, or unsupported regions.
To add it to the workflow, install the module and run checks against your templates:
      - name: Install PSRule for Azure
        run: |
          pwsh -Command "Install-Module -Name PSRule.Rules.Azure -Force -Scope CurrentUser"

      - name: Run PSRule analysis
        run: |
          pwsh -Command "Invoke-PSRule -Path ./policies"
You can extend PSRule with custom rules that map directly to your control matrix. For example, you could create a rule that checks whether all Storage Accounts have supportsHttpsTrafficOnly set to true. This ensures compliance issues are caught before deployment.
Custom PSRule example (YAML rule file):
---
- name: Ensure Storage Accounts enforce HTTPS
  type: Resource
  if:
    resourceType: Microsoft.Storage/storageAccounts
  then:
    field: properties.supportsHttpsTrafficOnly
    equals: true
    reason: "Storage Accounts must enforce HTTPS to meet GDPR and PCI DSS requirements."
If a developer submits a template with HTTPS disabled, PSRule flags it immediately, and the GitHub Action workflow fails.
Step 3: The “What-If” Preview
Even if templates are valid and pass linting, it’s useful to preview what they’ll actually do in Azure. The az deployment what-if command simulates a deployment, showing which resources will be created, modified, or deleted. This is particularly helpful for reviewers and auditors who want to understand the impact of changes.
Workflow snippet:
      - name: Run what-if deployment
        run: |
          az deployment sub what-if \
            --location eastus \
            --template-file ./policies/assignments/storage-https-assignment.bicep \
            --output json > whatif-result.json
You can enhance this step by using a GitHub Action that posts the what-if results as a comment on the pull request. This provides transparent, contextual feedback without requiring reviewers to run the command locally.
Example PR comment output:
### What-If Deployment Results:
- Create: Microsoft.Authorization/policyAssignments/storage-https-only
- Modify: Microsoft.Authorization/policySetDefinitions/pci-dss-core-controls
This gives the developer and reviewer confidence that the change aligns with expectations before it touches production.
5.2 The Guardrail in Action: Blocking Non-Compliant Infrastructure
Pre-deployment validation is powerful, but the real test of Compliance-as-Code comes when Azure itself blocks non-compliant resources. This is where policy effects like Deny prove their worth. Let’s walk through a scenario that demonstrates the guardrails in action.
Scenario Setup
A developer is working on a .NET application that requires a Storage Account for logs. They write the following Bicep code in their feature branch:
resource appStorage 'Microsoft.Storage/storageAccounts@2022-09-01' = {
  name: 'devappstorage123'
  location: 'eastus'
  sku: {
    name: 'Standard_LRS'
  }
  kind: 'StorageV2'
  properties: {
    supportsHttpsTrafficOnly: false // ❌ non-compliant
  }
}
Notice the issue: supportsHttpsTrafficOnly is explicitly set to false. According to the policy we deployed in Phase 1, this should be blocked.
The Deployment Workflow (deploy-app.yml)
When the developer opens a pull request, the CI pipeline includes a deployment step. The workflow attempts to deploy the application resources:
name: Deploy App
on:
  pull_request:
    branches: [ main ]

jobs:
  deploy:
    runs-on: ubuntu-latest
    steps:
      - uses: actions/checkout@v3

      - name: Azure Login
        uses: azure/login@v1
        with:
          creds: ${{ secrets.AZURE_CREDENTIALS }}

      - name: Deploy app resources
        run: |
          az deployment group create \
            --resource-group dev-app-rg \
            --template-file ./app/main.bicep
Deployment Failure and Error Message
Because of the non-compliant setting, the deployment fails. Azure Policy intercepts the request and enforces the Deny effect. The error message returned by Azure makes the issue clear:
Deployment failed. Correlation ID: 12345abc-def6-7890-ghij-klmnopqrstuv.
Policy assignment 'storage-https-only' failed because resource 'devappstorage123' violates policy:
Storage accounts must enforce HTTPS traffic only.
This feedback loops directly back into the pull request. The developer doesn’t need to wait for a manual audit; they immediately see why the deployment failed and what to fix.
Why This Matters
- Immediate feedback: Developers know within minutes, not days, whether their change violates compliance.
- Audit-ready evidence: The error message explicitly references the policy assignment, which can be tied back to the control matrix.
- Consistent enforcement: The same rules apply everywhere, regardless of who is deploying or what tool they use.
Corrected Example
The developer fixes their Bicep file:
resource appStorage 'Microsoft.Storage/storageAccounts@2022-09-01' = {
  name: 'devappstorage123'
  location: 'eastus'
  sku: {
    name: 'Standard_LRS'
  }
  kind: 'StorageV2'
  properties: {
    supportsHttpsTrafficOnly: true // ✅ compliant
  }
}
This time, the deployment succeeds, and the application proceeds through the pipeline without blockers.
Broader Implications
This scenario may seem small, but it illustrates the essence of Compliance-as-Code: the ability to codify regulatory requirements into enforceable, testable rules that developers encounter in their daily workflow. Instead of security being an external gate, it becomes a built-in part of the developer experience. Over time, developers internalize these guardrails and naturally produce compliant infrastructure definitions.
6 Phase 3: Surfacing Evidence and Detecting Drift
Once your compliance guardrails are codified and enforced, the next challenge is demonstrating proof. Security teams, auditors, and executives don’t just want to know that policies exist—they want evidence that those policies are being enforced consistently and that non-compliant resources are being identified in real time. This is where surfacing evidence and detecting drift become essential parts of a Compliance-as-Code workflow.
Azure gives us two powerful tools here: Microsoft Defender for Cloud and Azure Workbooks. Defender for Cloud provides a first-class compliance dashboard, while Workbooks let you design custom, auditor-ready views. Together, they transform your coded policies into visible, verifiable compliance posture.
6.1 Visualizing Compliance in Microsoft Defender for Cloud
Microsoft Defender for Cloud automatically integrates with Azure Policy. Any policy or initiative that you assign—whether built-in or custom—feeds directly into the Defender for Cloud compliance dashboard. This means your custom guardrails appear alongside Microsoft’s built-in standards such as PCI DSS, NIST, and ISO 27001.
Mapping Custom Initiatives
Suppose you created a PCI DSS initiative in Phase 1 using Bicep. To surface this in Defender for Cloud:
- Deploy the initiative definition (
pci-dss-initiative.bicep). - Assign it at a management group or subscription scope.
- Wait for Defender for Cloud to ingest the assignments (this usually happens within a few hours).
After ingestion, the Regulatory Compliance dashboard will display your custom initiative under a new section called Custom Initiatives. Each control inside the initiative appears with a compliance status: Healthy, Unhealthy, or Not Applicable.
Example screenshot (conceptual):
[Regulatory Compliance Dashboard]
--------------------------------
Custom Initiative: PCI DSS Core Initiative
- Control: Storage accounts must enforce HTTPS   → Healthy
- Control: Managed disks must be encrypted       → Unhealthy (3 resources)
- Control: NSGs must restrict inbound traffic    → Healthy
Compliance Score and Drift Detection
The dashboard calculates a compliance score that reflects how well your environment adheres to the assigned controls. Unlike static audit reports, this score updates continuously as resources are created, modified, or deleted.
This dynamic nature makes it a powerful drift detection mechanism:
- If a developer changes a resource directly in the Azure portal, Defender flags the drift.
- If an automated process bypasses IaC, the policy check highlights non-compliance.
- If exemptions are added, they are displayed with their category (
WaiverorMitigated) for traceability.
For operational teams, the dashboard provides a near real-time pulse check on cloud compliance posture. For auditors, it demonstrates continuous enforcement rather than periodic spot checks.
Pro tip: Use Azure Policy compliance details API to programmatically pull non-compliance data. This allows integration into existing SIEM tools or ticketing systems like ServiceNow and Jira.
6.2 Creating Custom Auditor-Ready Reports with Azure Workbooks
While Defender for Cloud provides strong out-of-the-box dashboards, auditors often ask for more targeted or customized evidence. They might want to see all resources violating a specific policy, or historical compliance trends for a particular initiative. This is where Azure Workbooks come in.
Workbooks let you build interactive dashboards using queries, charts, and tables. They’re particularly useful for compliance teams because you can design reports that answer auditor questions without requiring ad-hoc queries.
Step 1: Add a New Workbook
- In the Azure Portal, go to Monitor → Workbooks.
- Click + New to create a new workbook.
- Choose a blank workbook or start with a template (e.g., “Azure Policy compliance”).
Step 2: Use Azure Resource Graph Queries
Workbooks are powered by Kusto Query Language (KQL), which lets you pull data from Azure Resource Graph and Security resources. To extract compliance status for your custom PCI DSS initiative, run a query like:
securityresources
| where type == 'microsoft.security/assessments'
| where properties.status.code == 'Unhealthy'
| where properties.displayName contains 'PCI DSS'
| project resourceId, displayName, status = properties.status.code
This query lists all resources that are failing a control associated with your PCI DSS initiative.
Step 3: Render Results as a Table or Chart
In the workbook editor:
- Add a query tile and paste in the KQL query.
- Set visualization type to Table to list all failing resources.
- Optionally, add a Pie chart or Bar chart view to show distribution (e.g., number of failures per control).
Example table output (rendered in workbook):
| ResourceId | DisplayName | Status |
|---|---|---|
| /subscriptions/123/resourceGroups/prod-rg | Storage accounts must enforce HTTPS | Unhealthy |
| /subscriptions/123/resourceGroups/prod-rg | Managed disks must be encrypted | Unhealthy |
Creating a Shareable Compliance Dashboard
Once your queries and visualizations are set:
- Save the workbook under a descriptive name (e.g., PCI DSS Compliance Evidence).
- Assign permissions so compliance officers and auditors can view it directly.
- Pin the workbook to an Azure Dashboard for quick access.
Because Workbooks pull live data, auditors see the most up-to-date evidence at any moment. This eliminates the need for time-consuming screenshot-based audit packs.
Extending the Workbook
You can expand your workbook to answer more complex questions:
- Trend analysis: Show compliance score changes over time.
- Resource grouping: Break down compliance status by subscription or resource group.
- Exemption visibility: Add a query that lists all policies with active exemptions.
Example exemption query (KQL):
securityresources
| where type == 'microsoft.policyinsights/policystates'
| where properties.isCompliant == false
| where properties.policyAssignmentName contains 'exemption'
| project resourceId, properties.policyDefinitionName, properties.timestamp
This helps demonstrate to auditors that exemptions are tracked and temporary, not hidden.
Why Workbooks Matter
Defender for Cloud shows compliance status for operations teams. Workbooks provide a way to slice and present the same data in auditor-friendly views, focusing on evidence and traceability. By building standard workbooks for GDPR, PCI DSS, HIPAA, and CCPA, you save weeks of manual audit prep and create a “self-service” compliance reporting platform.
7 Phase 4: Managing the Inevitable: Exemptions and Real-World Scenarios
Even with the most carefully designed policies, you will encounter situations where rules cannot be followed 100% of the time. Legacy applications, third-party vendor constraints, or transitional workloads often create exceptions. Pretending these don’t exist or manually overriding policies introduces more risk than addressing them transparently. A mature Compliance-as-Code practice must handle exceptions with the same rigor as policies: codified, auditable, and time-bound.
7.1 The Right Way to Handle Exceptions: Auditable Waivers
A compliance framework that offers no flexibility is doomed to fail. Instead of forcing every workload into rigid conformity, Azure provides the Policy Exemption resource. Exemptions allow you to mark certain resources as exceptions to policy assignments while still keeping them visible in compliance reporting.
The critical point is governance through transparency: exemptions should be codified in the same repository as policies, reviewed via pull requests, and deployed through pipelines. This prevents “shadow IT” exemptions and ensures there is always a clear justification and expiration date.
7.1.1 Codifying an Exemption in Bicep
Here’s a simple policy-exemption.bicep file that exempts a specific Storage Account from the HTTPS-only policy:
param exemptionName string = 'storage-https-waiver'
param assignmentId string
param resourceId string

resource exemption 'Microsoft.Authorization/policyExemptions@2020-07-01-preview' = {
  name: exemptionName
  properties: {
    displayName: 'Waiver for legacy storage account HTTPS requirement'
    description: 'This exemption is required for legacy .NET batch job storage which cannot yet enforce HTTPS. Migration planned Q4.'
    policyAssignmentId: assignmentId
    scope: resourceId
    exemptionCategory: 'Waiver'
    expiresOn: '2024-12-31T23:59:59Z'
    metadata: {
      requestedBy: 'dev-team@contoso.com'
      approvedBy: 'security-lead@contoso.com'
      ticketId: 'INC-4521'
    }
  }
}
Key aspects to notice:
exemptionCategory: Must beWaiver(temporarily allowed non-compliance) orMitigated(control is met by an alternative mechanism).expiresOn: Ensures exemptions are temporary and periodically re-evaluated.metadata: Captures accountability—who requested, who approved, and the related ticket or risk record.
This metadata turns exemptions into auditable artifacts rather than undocumented workarounds.
7.1.2 The Exemption-as-Code Workflow
To enforce rigor, treat exemptions like code changes:
- Request: A developer or product owner raises a pull request with a new exemption file in
/exemptions. - Review: Security or compliance leads review the justification, ensuring metadata and expiration are appropriate.
- Approval: The PR is merged only after required reviewers approve.
- Deployment: A GitHub Action deploys the exemption using the Azure CLI.
GitHub Action snippet:
name: Deploy Exemption
on:
  push:
    paths:
      - 'exemptions/**.bicep'

jobs:
  deploy-exemption:
    runs-on: ubuntu-latest
    steps:
      - uses: actions/checkout@v3
      - name: Azure Login
        uses: azure/login@v1
        with:
          creds: ${{ secrets.AZURE_CREDENTIALS }}
      - name: Deploy Exemption
        run: |
          for file in $(find ./exemptions -name '*.bicep'); do
            az deployment sub create \
              --location eastus \
              --template-file $file
          done
This process leaves an immutable trail in Git, an audit log in Azure, and structured evidence for external reviews. Instead of exemptions undermining compliance, they become part of a controlled, reviewable lifecycle.
7.2 Continuous Monitoring and Remediation
While exemptions handle edge cases, continuous monitoring ensures the rest of your environment doesn’t silently drift. Azure Policy supports effects like DeployIfNotExists and Modify, which can automatically remediate non-compliant resources.
Auto-Remediation Example
Imagine a requirement: all Azure SQL Databases must have diagnostic logging enabled. Instead of merely auditing, you can deploy a policy that automatically enables logging if it’s missing.
Policy Definition snippet (JSON):
{
  "properties": {
    "displayName": "Enable diagnostic settings on SQL Databases",
    "policyType": "Custom",
    "mode": "All",
    "parameters": {},
    "policyRule": {
      "if": {
        "allOf": [
          {
            "field": "type",
            "equals": "Microsoft.Sql/servers/databases"
          },
          {
            "count": {
              "field": "Microsoft.Insights/diagnosticSettings",
              "where": {
                "field": "Microsoft.Insights/diagnosticSettings/logs[*].enabled",
                "equals": "true"
              }
            },
            "equals": 0
          }
        ]
      },
      "then": {
        "effect": "DeployIfNotExists",
        "details": {
          "type": "Microsoft.Insights/diagnosticSettings",
          "roleDefinitionIds": [
            "/providers/Microsoft.Authorization/roleDefinitions/749f88d5-cbae-40b8-bcfc-e573ddc772fa"
          ],
          "existenceCondition": {
            "field": "Microsoft.Insights/diagnosticSettings/logs[*].enabled",
            "equals": "true"
          },
          "deployment": {
            "properties": {
              "mode": "incremental",
              "template": {
                "$schema": "https://schema.management.azure.com/schemas/2019-04-01/deploymentTemplate.json#",
                "contentVersion": "1.0.0.0",
                "resources": [
                  {
                    "type": "Microsoft.Insights/diagnosticSettings",
                    "apiVersion": "2017-05-01-preview",
                    "name": "[concat(field('name'), '-diag')]",
                    "properties": {
                      "workspaceId": "[parameters('logAnalyticsWorkspaceId')]",
                      "logs": [
                        {
                          "category": "SQLSecurityAuditEvents",
                          "enabled": true
                        }
                      ]
                    }
                  }
                ]
              }
            }
          }
        }
      }
    }
  }
}
This policy not only detects when logging is disabled but actively deploys a diagnostic setting resource to bring the database into compliance.
Caution in Production
While remediation is powerful, it must be used with care. Auto-remediation can surprise teams by altering resources unexpectedly, potentially introducing downtime or conflicts. Best practice is to:
- Start with
Auditin dev/test environments. - Move to
DeployIfNotExistsonly for low-risk controls (logging, monitoring, tagging). - Avoid auto-remediation for high-impact controls like encryption or networking.
By combining monitoring with selective remediation, you maintain compliance without overwhelming developers or destabilizing systems.
8 Conclusion: Compliance as a Competitive Advantage
We began this journey with a familiar problem: compliance treated as a last-minute checkbox, blocking releases and creating stress. Through Compliance-as-Code, we’ve reimagined compliance as part of the delivery process—codified, automated, and collaborative.
The journey unfolded step by step:
- Translating legal obligations like GDPR, CCPA, PCI DSS, and HIPAA into actionable technical controls.
- Codifying those controls using Azure Policy and Bicep, scaling them into initiatives.
- Integrating with GitHub Actions to validate, preview, and block non-compliant infrastructure before it ever reaches production.
- Surfacing live evidence in Defender for Cloud and Workbooks to satisfy both operational and audit needs.
- Managing real-world scenarios with codified exemptions and carefully applied remediation policies.
The benefits are clear:
- Velocity: Developers ship faster because compliance checks happen automatically and early.
- Auditability: Evidence is always available, eliminating the pain of audit preparation.
- Consistency: Guardrails are applied across all environments, preventing drift.
- Security: Misconfigurations are prevented or remediated before they create risk.
In a cloud-native world, where infrastructure is ephemeral and applications evolve rapidly, Compliance-as-Code is not just a best practice—it’s a necessity. For .NET teams building on Azure, it transforms compliance from a source of fear into a foundation of trust. Organizations that embrace CaC gain not only regulatory alignment but also a strategic advantage: the ability to deliver secure, scalable, and compliant applications at speed.
Would you like me to provide an appendix of ready-to-use Bicep and GitHub Actions templates as a final companion to this article, so your teams can adopt these practices immediately?