The Bridge Design Pattern Explained Clearly (with Real-Life Examples and C# Code!)
Hey there, software architect! Ever found yourself tangled up in a web of tightly coupled code that made you wish you could bridge over troubled waters? Imagine you’re an architect building a bridge connecting two islands: one side is your application’s logic, and the other side is its implementation. Right now, your logic island is trapped—you can’t make any changes without disrupting everything else. Frustrating, isn’t it?
Well, fear not! Today, you’re about to discover a neat little secret called the Bridge Design Pattern. It’s your lifeline, your connector, your savior from the chaos of tightly coupled components. By the end of this article, you’ll understand exactly how to use this pattern to make your C# apps as modular, maintainable, and flexible as a LEGO castle.
Ready? Let’s dive in!
What is the Bridge Design Pattern?
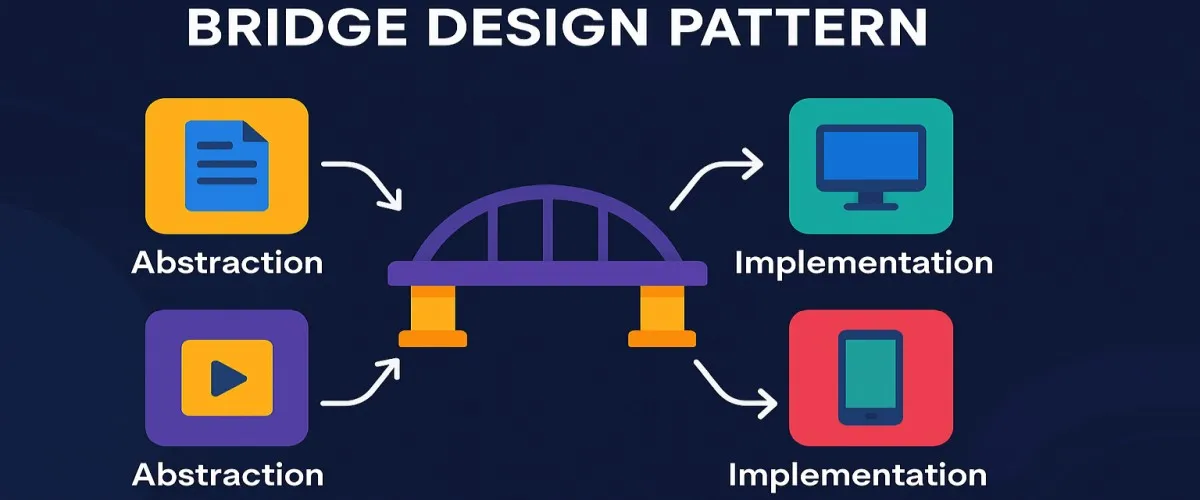
Simply put, the Bridge Design Pattern separates an abstraction from its implementation so that they can vary independently. It’s one of the classic Structural Patterns in software engineering. Think of it like your remote control and TV: you can switch remotes, upgrade your TV, or use the remote with other devices, all without needing to change everything at once.
Here’s a simplified analogy:
- Abstraction is your remote control.
- Implementation is your TV.
Change the TV, keep the remote—or vice versa. They’re connected, yet independent. Cool, right?
The Bridge Pattern is perfect when you want to avoid an explosion of classes caused by inheritance, or when you need your system to evolve separately along two dimensions—logic (abstraction) and implementation details.
Core Principles of the Bridge Design Pattern
To master the Bridge Pattern, you must grasp these core principles:
1. Separation of Concerns
- Your abstraction (high-level logic) should NOT know implementation details. Ever heard the phrase, “mind your own business”? It applies perfectly here.
2. Flexibility & Extensibility
- By separating abstraction from implementation, adding new abstractions or implementations becomes a breeze—like snapping extra LEGO bricks onto your masterpiece.
3. Composition over Inheritance
- Instead of creating deep inheritance hierarchies (messy and rigid), use composition to dynamically assign implementations to abstractions.
When Should You Use the Bridge Design Pattern?
Ask yourself these questions:
- Do you have multiple ways to implement a particular functionality?
- Is your current inheritance structure turning into spaghetti?
- Do you want the freedom to extend or modify implementations without rewriting the logic code?
If your answer to any of these questions is “yes,” then the Bridge Pattern might just be your superhero.
Real-world scenarios for Bridge Pattern include:
- Cross-platform GUI frameworks (Windows Forms, WPF)
- Database independence (Oracle, SQL Server, PostgreSQL)
- Payment gateways or communication protocols
Key Components of the Bridge Design Pattern
The Bridge Pattern has four key components:
| Component | Role |
|---|---|
| Abstraction | Defines the abstract interface and maintains a reference to an implementation object. |
| Refined Abstraction | Extends the abstraction and uses its methods. |
| Implementor | Defines the interface for implementation classes. |
| Concrete Implementor | Implements the Implementor interface. |
Think of them as players in a team sport:
- Abstraction: Team captain (controls the play)
- Refined Abstraction: Experienced players who customize the captain’s strategy
- Implementor: Coach who defines the rules
- Concrete Implementor: Actual players executing the coach’s instructions
Implementation with Detailed C# Example
Let’s build a practical example. Imagine we’re designing a notification system that sends messages. We have different types of notifications (SMS, Email, Push Notifications) and different types of messages (Alerts, Errors, Logs).
Without Bridge:
We might have classes exploding like this:
AlertEmailAlertSMSErrorEmailErrorSMSLogEmail- … (imagine the chaos with more!)
With Bridge:
We elegantly solve this with abstraction and implementation.
Step-by-Step Implementation
Step 1: Create the Implementor Interface
This defines the interface for sending messages.
// Implementor
public interface IMessageSender
{
    void SendMessage(string subject, string body);
}
Step 2: Concrete Implementations
These classes implement IMessageSender.
// Concrete Implementor 1
public class EmailSender : IMessageSender
{
    public void SendMessage(string subject, string body)
    {
        Console.WriteLine($"Email Sent!\nSubject: {subject}\nBody: {body}");
    }
}

// Concrete Implementor 2
public class SMSSender : IMessageSender
{
    public void SendMessage(string subject, string body)
    {
        Console.WriteLine($"SMS Sent!\nSubject: {subject}\nBody: {body}");
    }
}
You can easily add more implementations like PushNotificationSender later.
Step 3: Abstraction
Defines the structure for your messages:
// Abstraction
public abstract class Message
{
    protected IMessageSender messageSender;

    protected Message(IMessageSender sender)
    {
        messageSender = sender;
    }

    public abstract void Send();
}
Step 4: Refined Abstractions
Specific message types like Alerts, Errors, and Logs.
// Refined Abstraction 1
public class AlertMessage : Message
{
    private string _subject;
    private string _body;

    public AlertMessage(string subject, string body, IMessageSender sender)
        : base(sender)
    {
        _subject = $"Alert: {subject}";
        _body = body;
    }

    public override void Send()
    {
        messageSender.SendMessage(_subject, _body);
    }
}

// Refined Abstraction 2
public class ErrorMessage : Message
{
    private string _subject;
    private string _body;

    public ErrorMessage(string subject, string body, IMessageSender sender)
        : base(sender)
    {
        _subject = $"Error: {subject}";
        _body = body;
    }

    public override void Send()
    {
        messageSender.SendMessage(_subject, _body);
    }
}
Step 5: Client Code Usage
Here’s how you elegantly use your Bridge Pattern implementation:
class Program
{
    static void Main(string[] args)
    {
        IMessageSender emailSender = new EmailSender();
        IMessageSender smsSender = new SMSSender();

        Message alert = new AlertMessage("Server Down!", "The server is not responding.", emailSender);
        alert.Send();

        Message error = new ErrorMessage("NullReference Exception", "Object not set to an instance.", smsSender);
        error.Send();
    }
}
Output:
Email Sent!
Subject: Alert: Server Down!
Body: The server is not responding.

SMS Sent!
Subject: Error: NullReference Exception
Body: Object not set to an instance.
See how easy it was to extend? Just add new implementations or message types without breaking your existing code.
Why Does This Work So Well?
The beauty of this pattern is that both sides—your abstractions and implementations—are totally independent. Need another messaging system like WhatsApp? Just add a new WhatsAppSender without touching any message logic. Similarly, add a LogMessage or InfoMessage without modifying the senders. That’s freedom and flexibility!
Different Ways to Implement the Bridge Pattern (with C# Examples)
Hey architect, you might be wondering: “Is there more than one way to build this bridge?” Absolutely! Let’s explore alternative implementations that you might run into—or even prefer to use—in your projects.
Using Dependency Injection (DI)
Dependency Injection is like having a personal assistant handing you exactly what you need when you need it—without asking too many questions. It helps maintain loose coupling and makes unit testing a piece of cake.
Here’s how you can integrate DI into your bridge pattern:
// Implementor Interface
public interface ILogger
{
    void Log(string message);
}

// Concrete Implementors
public class ConsoleLogger : ILogger
{
    public void Log(string message) => Console.WriteLine($"Console Log: {message}");
}

public class FileLogger : ILogger
{
    public void Log(string message) => File.AppendAllText("log.txt", $"File Log: {message}\n");
}

// Abstraction
public abstract class ApplicationService
{
    protected ILogger _logger;

    public ApplicationService(ILogger logger)
    {
        _logger = logger;
    }

    public abstract void Execute();
}

// Refined Abstraction
public class PaymentService : ApplicationService
{
    public PaymentService(ILogger logger) : base(logger) { }

    public override void Execute()
    {
        _logger.Log("Executing payment service...");
        // Payment logic here
        _logger.Log("Payment executed successfully.");
    }
}

// Usage with DI (simplified)
class Program
{
    static void Main()
    {
        ILogger logger = new ConsoleLogger();  // could easily swap with FileLogger
        ApplicationService service = new PaymentService(logger);
        service.Execute();
    }
}
Output:
Console Log: Executing payment service...
Console Log: Payment executed successfully.
You see? With DI, swapping loggers (implementations) is effortless—like changing your shoes depending on the weather.
Factory Method Implementation
A factory pattern lets you create objects without exposing the creation logic to the client. This approach neatly complements the Bridge Pattern.
// Implementor
public interface IRenderer
{
    void Render(string shape);
}

// Concrete Implementors
public class RasterRenderer : IRenderer
{
    public void Render(string shape) => Console.WriteLine($"Rendering {shape} in pixels.");
}

public class VectorRenderer : IRenderer
{
    public void Render(string shape) => Console.WriteLine($"Rendering {shape} in vectors.");
}

// Factory for creating renderers
public static class RendererFactory
{
    public static IRenderer GetRenderer(string type) =>
        type switch
        {
            "Raster" => new RasterRenderer(),
            "Vector" => new VectorRenderer(),
            _ => throw new ArgumentException("Unknown renderer type")
        };
}

// Abstraction
public abstract class Shape
{
    protected IRenderer renderer;

    protected Shape(IRenderer renderer)
    {
        this.renderer = renderer;
    }

    public abstract void Draw();
}

// Refined Abstraction
public class Circle : Shape
{
    public Circle(IRenderer renderer) : base(renderer) { }

    public override void Draw() => renderer.Render("Circle");
}

// Usage
class Program
{
    static void Main()
    {
        Shape circle = new Circle(RendererFactory.GetRenderer("Vector"));
        circle.Draw();

        Shape pixelCircle = new Circle(RendererFactory.GetRenderer("Raster"));
        pixelCircle.Draw();
    }
}
Output:
Rendering Circle in vectors.
Rendering Circle in pixels.
Factory methods allow your abstraction to remain completely unaware of the specific implementation details—keeping your code neat and tidy.
Common Use Cases for Bridge Design Pattern
Where should you apply the Bridge Pattern in real-life scenarios?
- Cross-Platform Development: Abstract your UI elements away from platform-specific details (Windows, macOS, Android).
- Database Drivers: Easily swap between different database implementations (Oracle, SQL Server, MongoDB).
- Logging Frameworks: Switch logging from file-based logging to cloud-based logging seamlessly.
- Notification Systems: As we discussed previously, effortlessly integrate multiple notification methods (Email, SMS, Push).
- Payment Gateways: Add or switch payment providers (PayPal, Stripe, Credit Card) without changing your checkout logic.
In short, use Bridge wherever you need flexibility without the pain of changing existing logic.
Advantages of the Bridge Design Pattern
Why bother with this Bridge thing anyway? Here’s the good news:
- Reduces Complexity: It avoids complicated inheritance structures, keeping your codebase manageable and easy to understand.
- Enhances Flexibility: Abstraction and implementation can evolve independently—without stepping on each other’s toes.
- Improves Maintainability: It’s easier to fix bugs or introduce new features because changing one side won’t ripple through your entire app.
- Boosts Scalability: Adding new implementations or abstractions won’t break your existing code. Ever heard the phrase, “plug and play”? That’s Bridge.
- Encourages Single Responsibility Principle (SRP): Each class does exactly one job, promoting cleaner, clearer code.
Disadvantages of the Bridge Design Pattern
Wait—everything has a catch, right? Here’s where the Bridge Pattern may challenge you:
- ️ Increased Complexity (Initially): Initially setting up a Bridge Pattern can seem overly complex or unnecessary—especially for simple scenarios. Like building a multi-lane highway for two cars.
- ️ More Classes & Interfaces: You might see your class count go up. If not careful, your team may initially resist the overhead.
- ️ Requires Discipline: It demands that developers maintain clear boundaries between abstractions and implementations. Blurred lines can create confusion later on.
However, these downsides usually fade quickly as your system scales. Think of it as upfront investment—painful at first, invaluable in the long run.
Wrapping It Up – Conclusion
So, what have we learned? The Bridge Design Pattern is your secret weapon for building flexible, maintainable, and scalable systems by elegantly separating your application’s abstraction (the logic) from the implementation (the actual work). You just saw how easy it was to scale and add new features without breaking your app.
Next time you face tight coupling or sprawling class hierarchies, ask yourself: “Could the Bridge Pattern solve this?” If your answer is yes, bridge the gap and make your life easier.
Keep your architecture clean, modular, and adaptable—just like the pros at Microsoft do with their technologies. Now go ahead and bridge the divide, Architect! You’ve got this.
Share this article
Help others discover this content
About Sudhir mangla
Content creator and writer passionate about sharing knowledge and insights.
View all articles by Sudhir mangla →